项目背景
记录狂神大佬的SpringBoot练手项目,建议有空跟着视频kao一遍,笔记记录大体项目编写流程,并记录一些自身练习过程中碰到的疑难点、对相关技术原理进行拓展。
项目涉及到的模块功能、技术点请移步 左侧 一级标题
文章(一)基于map结构模拟数据库进行数据的增删改查
文章(二)接入真实数据库
项目环境:
Jdk:v.1.8
完整项目地址(未接入数据库):https://github.com/codersliu/springboot03-manasys
静态资源自取↑
tips:方法变量命名啥的有自己的命名习惯,所以会稍有不同,但大体上是保持一致的,请放心食用~
SpringBoot自动装配机制详解
为了写出优秀的。。。crud?程序,首先就要弄懂SpringBoot的自动装配机制以便于理解后续的整体编程逻辑。
SpringBoot的特征约定大于配置,其核心是自动装配,尽可能以简单配置达到早期SSM开发中的繁琐配置,简化开发流程。
启动类注解@SpringBootApplication,被该注解修饰的类会被识别为启动类,程序启动时在该启动类下执行main函数。剖析源码就能发现@SpringBootApplication也是由多个其它注解组合而成
1
2
3
4
5
6
7
8
9
10
11
12
13
14
15
16
17
18
19
20
21
22
23
| @Target(ElementType.TYPE)
@Retention(RetentionPolicy.RUNTIME)
@Documented
@Inherited
@SpringBootConfiguration
@EnableAutoConfiguration
@ComponentScan(excludeFilters = {
@Filter(type = FilterType.CUSTOM, classes = TypeExcludeFilter.class),
@Filter(type = FilterType.CUSTOM, classes = AutoConfigurationExcludeFilter.class) })
public @interface SpringBootApplication {
@AliasFor(annotation = EnableAutoConfiguration.class)
Class<?>[] exclude() default {};
@AliasFor(annotation = EnableAutoConfiguration.class)
String[] excludeName() default {};
@AliasFor(annotation = ComponentScan.class, attribute = "basePackages")
String[] scanBasePackages() default {};
@AliasFor(annotation = ComponentScan.class, attribute = "basePackageClasses")
Class<?>[] scanBasePackageClasses() default {};
}
|
其中三个核心注解
1
2
3
| @SpringBootConfiguration(代表一个配置类,相当于beans.xml文件,beans.xml中一个类对应一个Bean)
@EnableAutoConfiguration
@ComponentScan(自动扫描并加载符合条件的组件或bean定义,并加载到容器中去)
|
展开说说@EnableAutoConfiguration注解,该注解用于开启SpringBoot的自动装配。深入剖析源码
1
2
3
4
5
6
7
8
9
10
11
12
13
| @Target(ElementType.TYPE)
@Retention(RetentionPolicy.RUNTIME)
@Documented
@Inherited
@AutoConfigurationPackage
@Import(AutoConfigurationImportSelector.class)
public @interface EnableAutoConfiguration {
String ENABLED_OVERRIDE_PROPERTY = "spring.boot.enableautoconfiguration";
Class<?>[] exclude() default {};
String[] excludeName() default {};
}
|
源码中@Important下引入了选择器AutoConfigurationImportSelector.class,@EnableAutoConfiguratoin通过该选择器将所有符合调价的@SpringBootConfiguration配置加载到IoC容器中,并借助工具类SpringFactoriesLoader实现自动配置。
1
2
3
4
5
6
7
8
9
10
11
12
13
14
15
16
17
18
19
20
21
22
23
24
25
26
27
28
29
30
31
32
33
34
35
36
37
|
public class AutoConfigurationImportSelector implements DeferredImportSelector, BeanClassLoaderAware, ResourceLoaderAware, BeanFactoryAware, EnvironmentAware, Ordered {
...
public String[] selectImports(AnnotationMetadata annotationMetadata) {
if (!this.isEnabled(annotationMetadata)) {
return NO_IMPORTS;
} else {
AutoConfigurationMetadata autoConfigurationMetadata = AutoConfigurationMetadataLoader.loadMetadata(this.beanClassLoader);
AnnotationAttributes attributes = this.getAttributes(annotationMetadata);
List<String> configurations = this.getCandidateConfigurations(annotationMetadata, attributes);
configurations = this.removeDuplicates(configurations);
Set<String> exclusions = this.getExclusions(annotationMetadata, attributes);
this.checkExcludedClasses(configurations, exclusions);
configurations.removeAll(exclusions);
configurations = this.filter(configurations, autoConfigurationMetadata);
this.fireAutoConfigurationImportEvents(configurations, exclusions);
return StringUtils.toStringArray(configurations);
}
}
protected List<String> getCandidateConfigurations(AnnotationMetadata metadata, AnnotationAttributes attributes) {
List<String> configurations = SpringFactoriesLoader.loadFactoryNames(this.getSpringFactoriesLoaderFactoryClass(), this.getBeanClassLoader());
Assert.notEmpty(configurations, "No auto configuration classes found in META-INF/spring.factories. If you are using a custom packaging, make sure that file is correct.");
return configurations;
}
...
}
|
SpringFactoriesLoader从指定的配置文件META-INF/spring.factores加载配置。
1
2
3
4
5
6
7
8
9
10
11
12
13
14
15
16
17
18
19
20
21
22
23
24
25
26
27
28
29
30
| public abstract class SpringFactoriesLoader {
public static final String FACTORIES_RESOURCE_LOCATION = "META-INF/spring.factories";
private static Map<String, List<String>> loadSpringFactories(@Nullable ClassLoader classLoader) {
MultiValueMap<String, String> result = cache.get(classLoader);
if (result != null)
return result;
try {
Enumeration<URL> urls = (classLoader != null ?
classLoader.getResources(FACTORIES_RESOURCE_LOCATION) :
ClassLoader.getSystemResources(FACTORIES_RESOURCE_LOCATION));
result = new LinkedMultiValueMap<>();
while (urls.hasMoreElements()) {
URL url = urls.nextElement();
UrlResource resource = new UrlResource(url);
Properties properties = PropertiesLoaderUtils.loadProperties(resource);
for (Map.Entry<?, ?> entry : properties.entrySet()) {
List<String> factoryClassNames = Arrays.asList(
StringUtils.commaDelimitedListToStringArray((String) entry.getValue()));
result.addAll((String) entry.getKey(), factoryClassNames);
}
}
cache.put(classLoader, result);
return result;
}
catch (IOException ex) {
throw new IllegalArgumentException("Unable to load factories from location [" +
FACTORIES_RESOURCE_LOCATION + "]", ex);
}
}
...
|
以上源码分析可知,SpringBoot整体的自动装配流程是:
(1)从classpath中查找META-INF/spring.factories配置文件,获取EnableAutoConfiguration指定的值
(2)并将其中的org.springframework.boot.autoconfigure.EnableutoConfiguration对应配置项通过反射实例化为标注了@Configuration的JavaConfig形式的IoC容器配置类,并加载到容器中,自动配置类就生效了,帮助我们完成自动配置工作。
(3)J2EE的整体解决方案和自动配置在Springboot-autoconfigure的jar包中.
(4)它给容器中导入大量自动配置类xxxAutoConfiguration,即将场景所需组件导入容器,并进行配置。最终完成自动配置,免去了开发人员手动编写配置注入功能组件的工作。
注解关系大体如下:

准备工作-仿真数据
okk,有了以上先验知识后就可以开始项目了,新建一个Spring项目
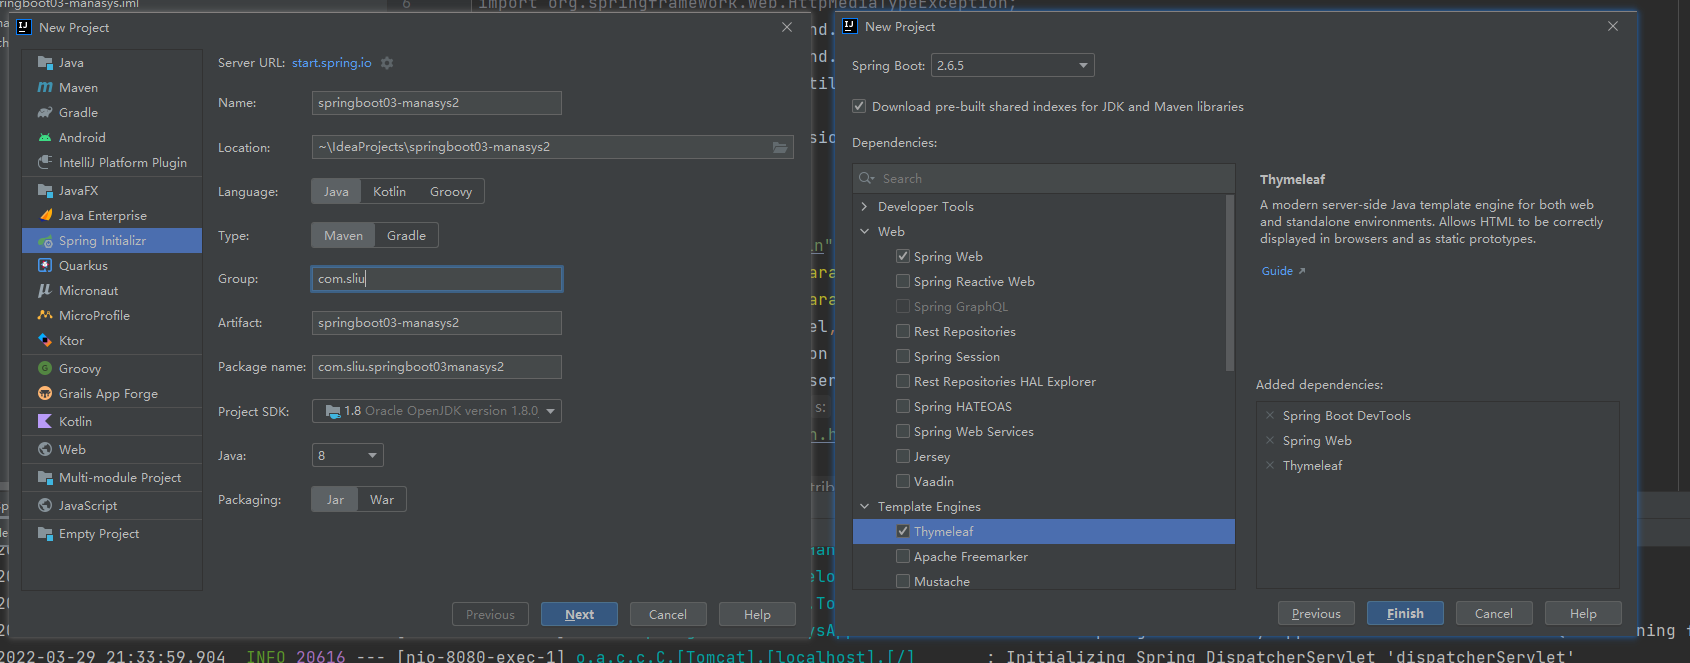
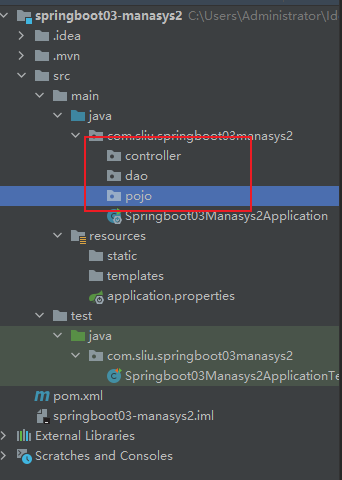
员工管理系统包括两个数据结构:员工(Employee)&部门(Department)。经典MVC模式,将类包装在pojo层,包结构如下:
引入@lombok注解标准化类
1
2
3
4
| <dependency>
<groupId>org.projectlombok</groupId>
<artifactId>lombok</artifactId>
</dependency>
|
新建类Employee和Department:
其中Employee下生日自动生成,不添加@AllArgsConstructor注释而自定义有参构造函数
1
2
3
4
5
6
7
8
9
10
11
12
13
14
15
16
17
18
19
20
21
22
23
24
25
26
| package com.sliu.springboot03manasys2.pojo;
import lombok.Data;
import lombok.NoArgsConstructor;
import java.util.Date;
@Data
@NoArgsConstructor
public class Employee {
private Integer id;
private String name;
private String email;
private Integer sex;
private Department department;
private Date birth;
public Employee(Integer id, String name, String email, Integer sex, Department department) {
this.id = id;
this.name = name;
this.email = email;
this.sex = sex;
this.department = department;
this.birth = new Date();
}
}
|
1
2
3
4
5
6
7
8
9
10
11
12
13
| package com.sliu.springboot03manasys2.pojo;
import lombok.AllArgsConstructor;
import lombok.Data;
import lombok.NoArgsConstructor;
@Data
@NoArgsConstructor
@AllArgsConstructor
public class Department {
private Integer id;
private String name;
}
|
定义了要访问的两个对象,为了模拟数据库,通过在dao层下定义静态代码块对map<Integer,
Department/Student>结构的数据模拟数据初始化,并将相应的查询全部员工信息、通过id查询员工信息、新增员工信息、删除员工信息、查询全部部门信息、通过id查询部门信息的业务代码封装在employeeDao和departmentDao中。
1
2
3
4
5
6
7
8
9
10
11
12
13
14
15
16
17
18
19
20
21
22
23
24
25
26
27
28
29
30
31
32
33
34
35
36
37
38
39
40
41
42
43
44
45
46
47
48
49
50
51
| package com.sliu.springboot03manasys.dao;
import com.sliu.springboot03manasys.pojo.Department;
import com.sliu.springboot03manasys.pojo.Employee;
import org.springframework.beans.factory.annotation.Autowired;
import org.springframework.stereotype.Repository;
import java.util.Collection;
import java.util.HashMap;
import java.util.Map;
@Repository
public class employeeDao {
static Map<Integer, Employee> employeeMap = null;
@Autowired
private departmentDao departmentDao;
static {
employeeMap = new HashMap<>();
employeeMap.put(1001, new Employee(1001, "jacksliu", "19689624@qq.com", 1, new Department(101, "教学部")));
employeeMap.put(1002, new Employee(1002, "happy", "19689624@qq.com", 0, new Department(102, "生活部")));
employeeMap.put(1003, new Employee(1003, "hodoow", "19689624@qq.com", 1, new Department(103, "财务部")));
employeeMap.put(1004, new Employee(1004, "marry", "19689624@qq.com", 0, new Department(104, "后勤部")));
employeeMap.put(1005, new Employee(1005, "candy", "19689624@qq.com", 1, new Department(105, "保卫部")));
}
private static Integer initId = 1006;
public void add(Employee employee){
if(employee.getId() == null){
employee.setId(initId++);
}
employee.setDepartment(departmentDao.getDepartmentById(employee.getDepartment().getId()));
employeeMap.put(employee.getId(), employee);
}
public Collection<Employee> getAllEmployee(){
return employeeMap.values();
}
public Employee getEmployeeById(Integer id){
return employeeMap.get(id);
}
public void deleteEmp(Integer id){
employeeMap.remove(id);
}
}
|
1
2
3
4
5
6
7
8
9
10
11
12
13
14
15
16
17
18
19
20
21
22
23
24
25
26
27
28
29
| package com.sliu.springboot03manasys2.dao;
import com.sliu.springboot03manasys2.pojo.Department;
import org.springframework.stereotype.Repository;
import java.util.Collection;
import java.util.HashMap;
import java.util.Map;
@Repository
public class departmentDao {
static Map<Integer, Department> departmentMap;
static {
departmentMap = new HashMap<>();
departmentMap.put(101, new Department(101, "教学部"));
departmentMap.put(102, new Department(102, "生活部"));
departmentMap.put(103, new Department(103, "财务部"));
departmentMap.put(104, new Department(104, "后勤部"));
departmentMap.put(105, new Department(105, "保卫部"));
}
public Collection<Department> getAllDepartment(){
return departmentMap.values();
}
public Department getDepartmentById(Integer id){
return departmentMap.get(id);
}
}
|
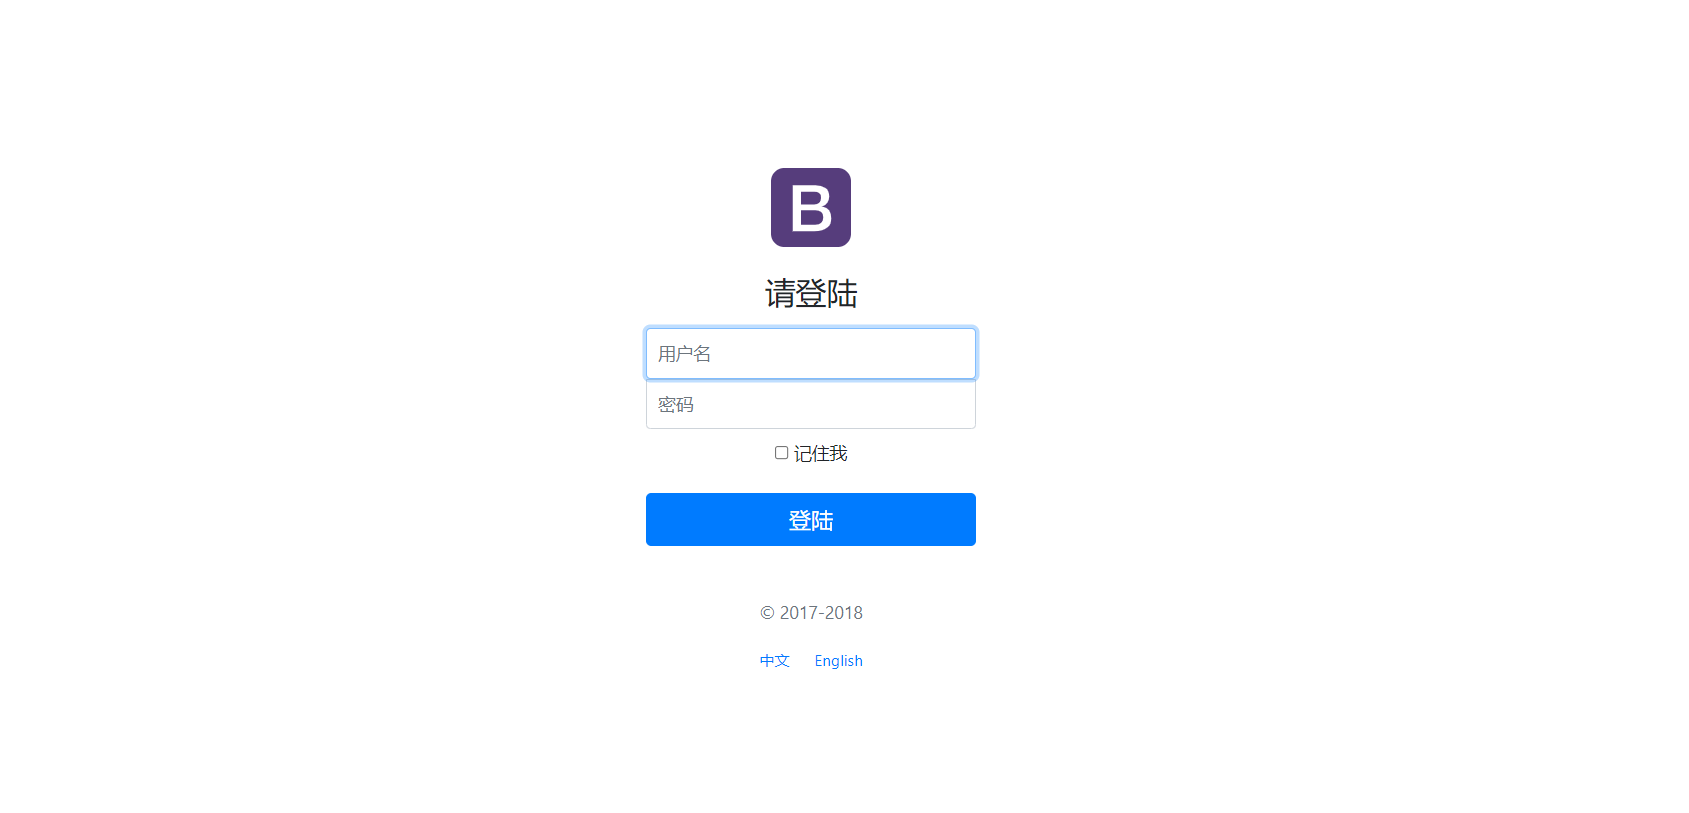
首页实现与国际化
首页实现
导入静态资源/resources/templates文件,拷贝到项目对应目录下,由于使用thymeleaf实现前后端交互,在application.properties中关闭模版引擎缓存
1
2
|
spring.thymeleaf.cache=false
|
为了在用户输入localhost://8080/index.html类似链接时访问到主页,在启动类下绑定视图

我们在项目文件下新建了一个config/myMvcConfig类,并实现了WebMvcConfigurer接口,Override其中的addViewControllers方法,为什么呢?
简单来说通过该方法就能实现一个请求映射为视图,实现无业务逻辑跳转,具体实现方案戳
Spring
Boot中使用addViewController实现实现无业务逻辑跳转
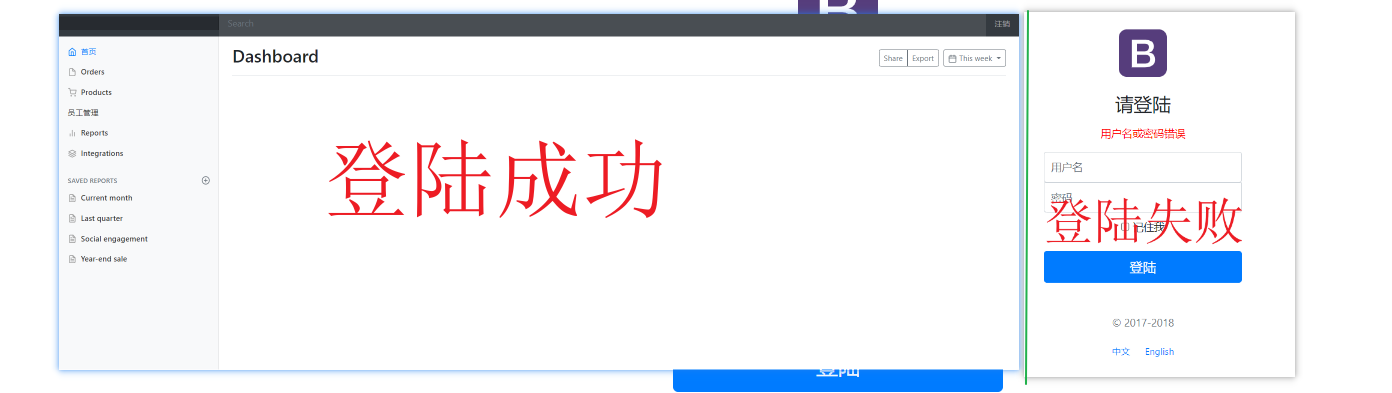
首页效果↓
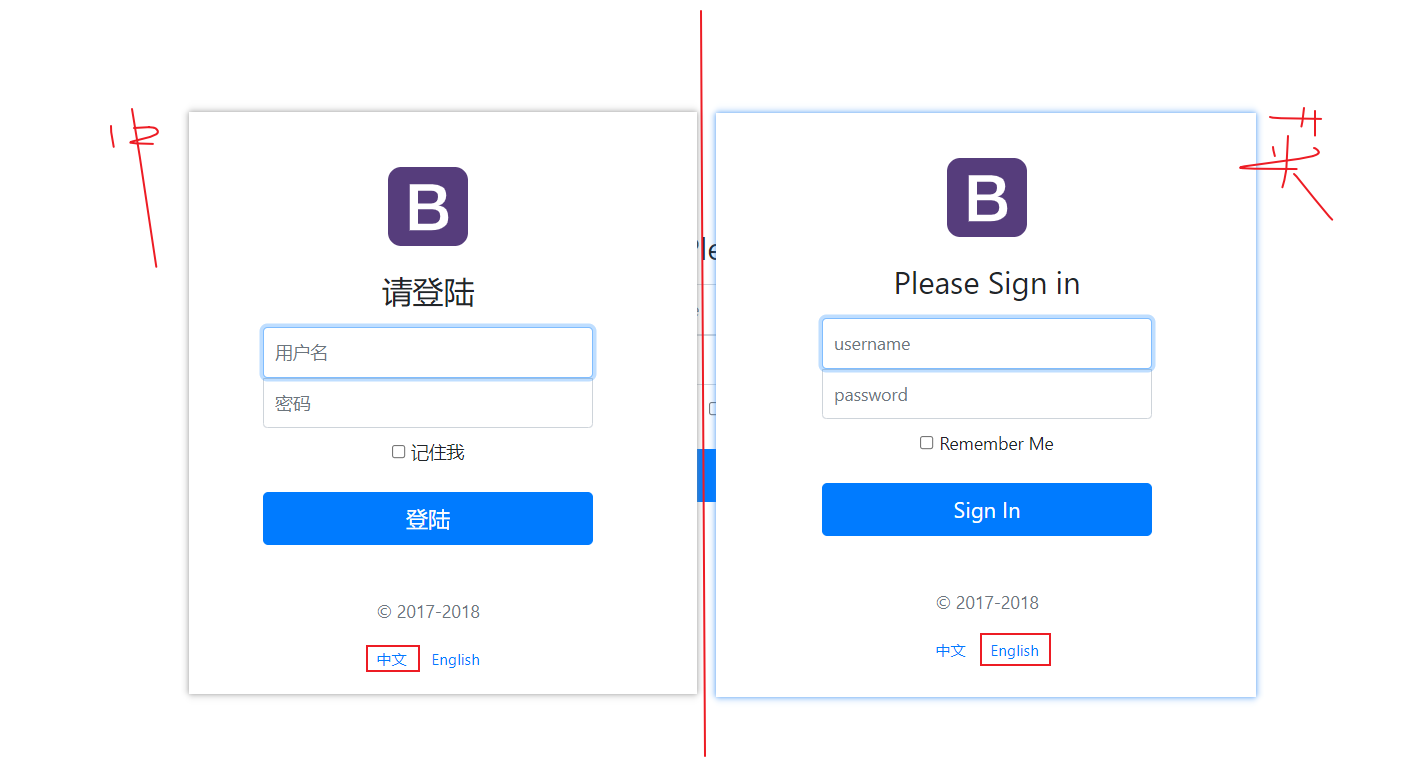
国际化
该模块功能通过点击中文和English实现中英文页面的切换。效果图↓
首先检查项目编码是否为'utf-8',防止乱码
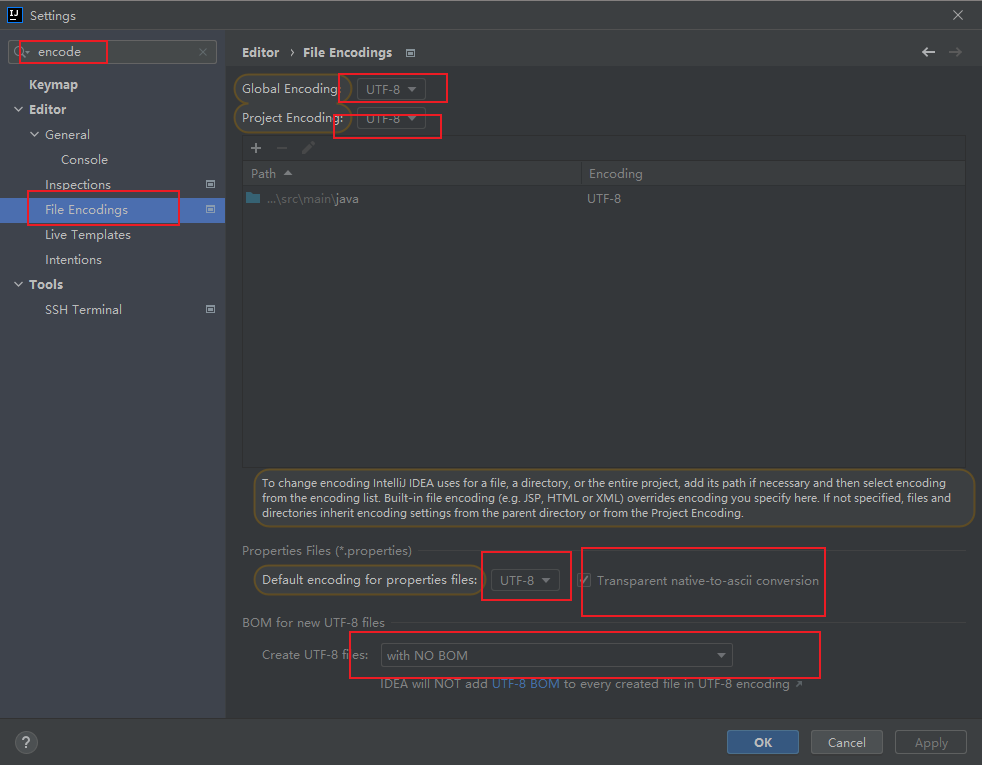
resources下新建文件i18n/login.properties i18n/login_en_US.properties
i18n/login_zh_CN.properties 三个文件夹,并安装IDEA的resource bundle
editor组件进行图形化配置,配置信息如↓:
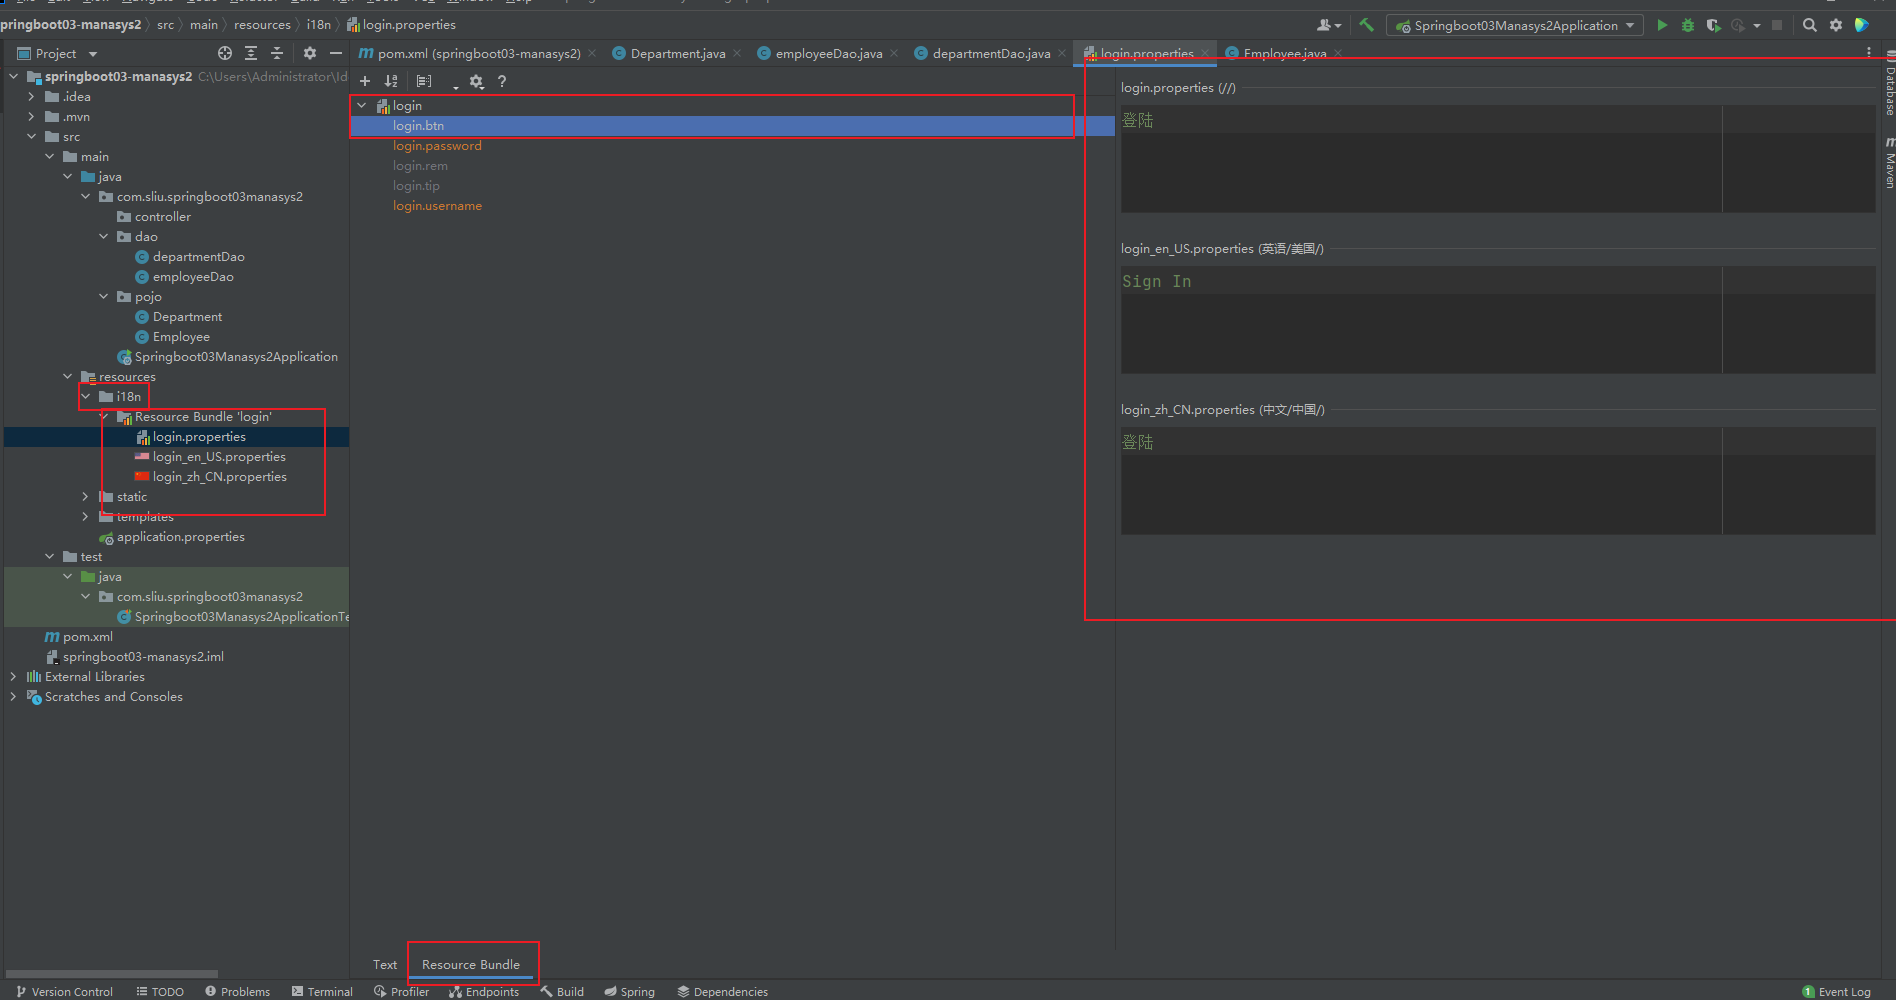
其它四个字段类似
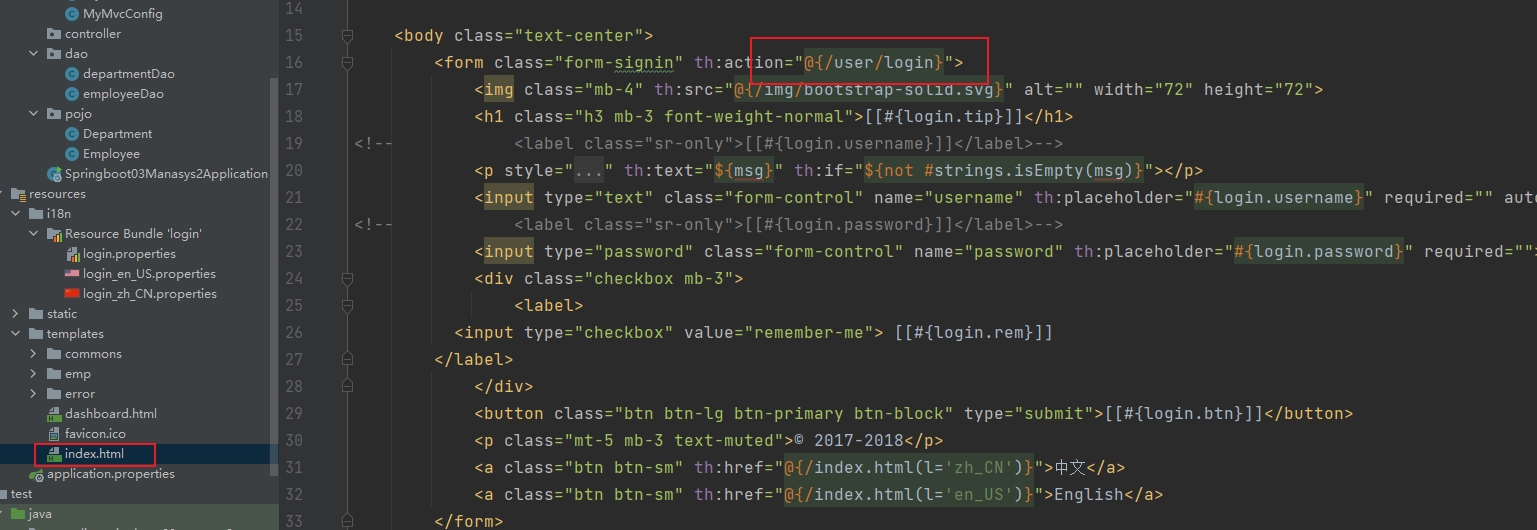
对index.html页面信息进行修改(以下部分涉及到部分前端知识,看看大体框架就好):
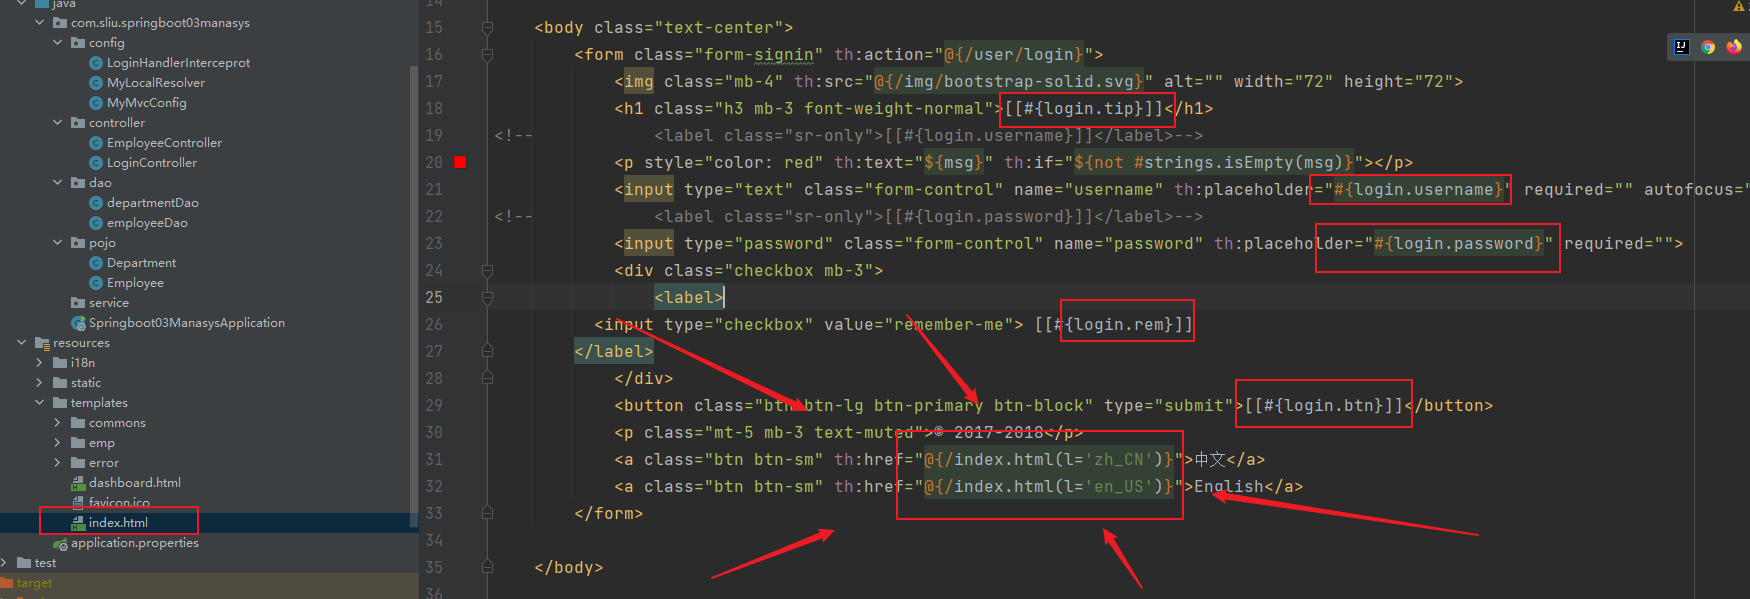
其中要需要关注的是在底部两个按钮中除了进行页面跳转,还在url中附带了相应的编码字段zh_CN或en_US
通过附带的参数实现页面编码格式的转换,为了覆盖默认编码,通过在config文件下新建MyLocalResolver类来实现编码自定义,该类继承了LocaleResolve类并Override了该类下的resolveLocale方法,重写方法后的逻辑请看↓
1
2
3
4
5
6
7
8
9
10
11
12
13
14
15
16
17
18
19
20
21
22
23
24
25
26
27
28
| package com.sliu.springboot03manasys.config;
import org.apache.tomcat.jni.Local;
import org.springframework.web.servlet.LocaleResolver;
import org.thymeleaf.util.StringUtils;
import javax.servlet.http.HttpServletRequest;
import javax.servlet.http.HttpServletResponse;
import java.util.Locale;
public class MyLocalResolver implements LocaleResolver {
@Override
public Locale resolveLocale(HttpServletRequest request) {
String language = request.getParameter("l");
Locale locale = Locale.getDefault();
if(!StringUtils.isEmpty(language)){
String[] split = language.split("_");
locale = new Locale(split[0], split[1]);
}
return locale;
}
@Override
public void setLocale(HttpServletRequest request, HttpServletResponse response, Locale locale) {
}
}
|
同时,在MyMvcConfig类中添加↓加载到容器中
1
2
3
4
5
|
@Bean
public LocaleResolver localeResolver(){
return new MyLocalResolver();
}
|
最后在application.properties添加
1
| spring.messages.basename=i18n.login
|
登陆与拦截器
登陆功能
查看前端页面登陆按钮绑定的url为/user/login
新建controller/LoginController
1
2
3
4
5
6
7
8
9
10
11
12
13
14
15
16
17
18
19
20
21
22
23
24
25
| package com.sliu.springboot03manasys2.controller;
import com.sliu.springboot03manasys2.dao.employeeDao;
import com.sliu.springboot03manasys2.pojo.Employee;
import com.sun.org.glassfish.gmbal.ParameterNames;
import org.springframework.stereotype.Controller;
import org.springframework.ui.Model;
import org.springframework.web.bind.annotation.PathVariable;
import org.springframework.web.bind.annotation.RequestMapping;
import org.springframework.web.bind.annotation.RequestParam;
@Controller
public class LoginController {
employeeDao employeeDao = new employeeDao();
@RequestMapping("/user/login")
@ParameterNames
public String login(@RequestParam("username") String username, @RequestParam("password") String password, Model model){
if (!username.isEmpty()&&password.equals("123456")){
return "redirect:/main.html";
}else{
model.addAttribute("msg", "用户名或密码错误");
return "index";
}
}
}
|
登陆成功后重定向到的页面为什么是main.html呢,这里是为了避免跳转后的url附带用户名和密码导致信息泄漏,所以在MyMvcConfig类下addViewControllers方法中自定义映射关系:
1
| registry.addViewController("/main.html").setViewName("dashboard");
|
最终效果:
拦截器
当前实现的登陆功能,仍然存在数据不安全的问题。用户在不登陆情况下输入url/main.html就能够直接访问到后台页面,所以要对用户的登陆状态进行校验,避免以上情况。
拦截器+Session就是一个很好的解决方案,大体设计方案如下:
当登陆成功时通过Session记录当前用户的username,当要访问拦截器所拦截的页面时对Session进行校验,Session不为Null放行,否则进行拦截并返回首页。
具体实现↓
修改LoginController类下login方法,在登陆成功时设置Session
1
2
3
4
5
6
7
8
9
10
11
12
13
14
15
| @Controller
public class LoginController {
employeeDao employeeDao = new employeeDao();
@RequestMapping("/user/login")
@ParameterNames
public String login(@RequestParam("username") String username, @RequestParam("password") String password, Model model, HttpSession session){
if (!username.isEmpty()&&password.equals("123456")){
session.setAttribute("loginUser", username);
return "redirect:/main.html";
}else{
model.addAttribute("msg", "用户名或密码错误");
return "index";
}
}
}
|
新建config/LoginHandlerInterceprot类,实现HandlerInterceprot接口,并Override
preHandle方法,以自定义拦截器
1
2
3
4
5
6
7
8
9
10
11
12
13
14
15
16
17
18
19
20
| package com.sliu.springboot03manasys2.config;
import org.springframework.web.servlet.HandlerInterceptor;
import javax.servlet.http.HttpServletRequest;
import javax.servlet.http.HttpServletResponse;
public class LoginHandlerInterceprot implements HandlerInterceptor {
@Override
public boolean preHandle(HttpServletRequest request, HttpServletResponse response, Object handler) throws Exception {
Object loginUser = request.getSession().getAttribute("loginUser");
if(loginUser==null){
request.setAttribute("msg", "没有权限,请登录");
request.getRequestDispatcher("/index.html").forward(request, response);
return false;
}else{
return true;
}
}
}
|
并配置到MyMvcConfig中,同时设置要过滤的页面和白名单。
1
2
3
4
5
| @Override
public void addInterceptors(InterceptorRegistry registry) {
registry.addInterceptor(new LoginHandlerInterceprot()).
addPathPatterns("/**").excludePathPatterns("/","/index.html","/css/**", "/img/**", "/js/**", "/user/login");
}
|
最终效果:

注销功能
注销功能通过清除Session信息并跳转首页即可实现,逻辑简单,不具体分析
LoginController下添加以下方法
1
2
3
4
5
| @RequestMapping("/user/signout")
public String signout(HttpSession session){
session.invalidate();
return "redirect:/index.html";
}
|
添加员工与删除员工
添加员工
先看看最终效果再确定设计思路
首先当我们登陆成功后,点击员工管理选项跳转员工信息页面,员工信息页面如↓
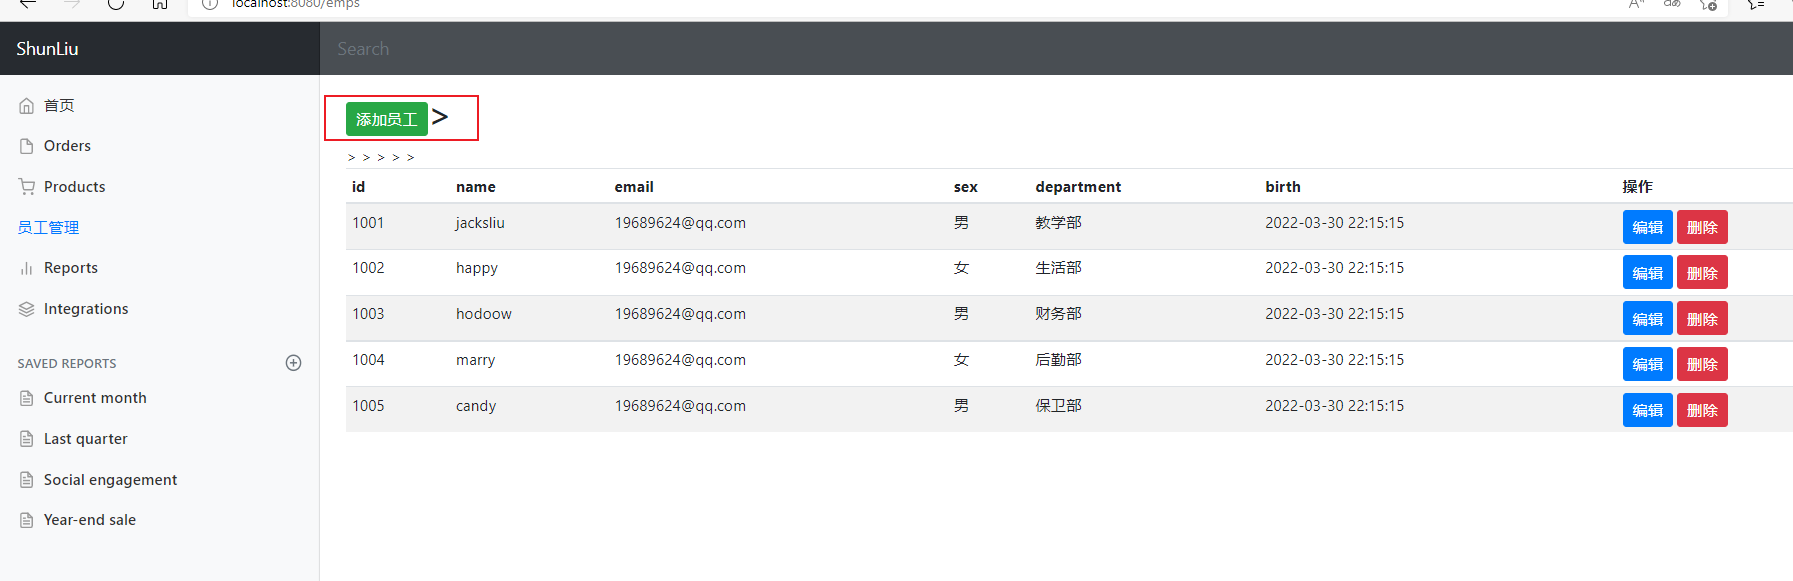
点击添加员工按钮跳转添加页面
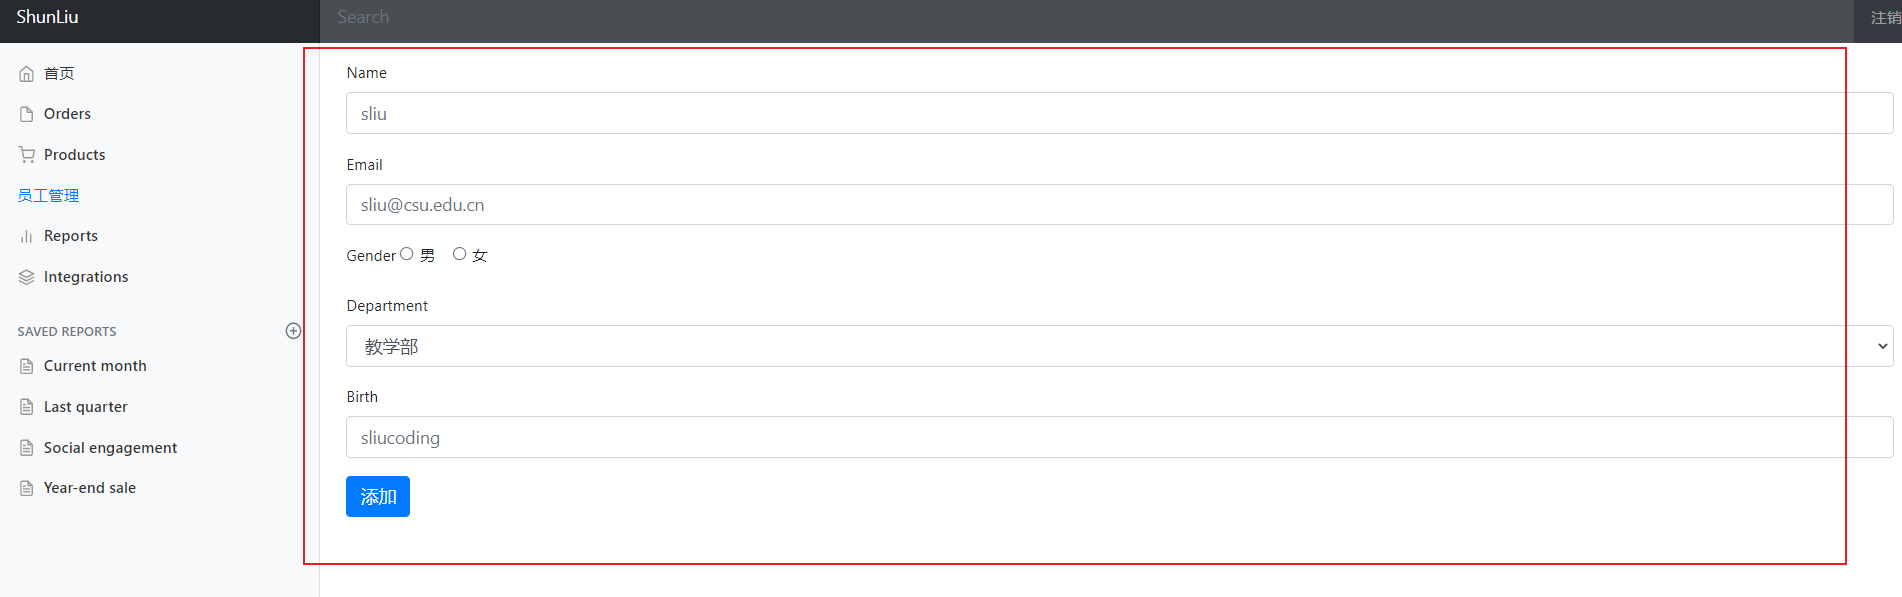
输入信息点击添加按钮,并返回到员工信息页面
新建一个controller/EmployeeController类
逐步实现以上功能:
(1)点击员工管理选项跳转员工信息页面
1
2
3
4
5
6
7
8
9
10
11
12
13
14
15
16
17
18
19
20
21
22
23
24
25
26
| package com.sliu.springboot03manasys2.controller;
import com.sliu.springboot03manasys2.dao.departmentDao;
import com.sliu.springboot03manasys2.dao.employeeDao;
import com.sliu.springboot03manasys2.pojo.Employee;
import org.springframework.beans.factory.annotation.Autowired;
import org.springframework.stereotype.Controller;
import org.springframework.ui.Model;
import org.springframework.web.bind.annotation.RequestMapping;
import java.util.Collection;
@Controller
public class EmployeeController {
@Autowired
employeeDao employeedao;
@Autowired
departmentDao departmentdao;
@RequestMapping("emps")
public String list(Model model){
Collection<Employee> employees = employeedao.getAllEmployee();
model.addAttribute("emps", employees);
return "emp/list";
}
}
|
以下通过RestFul风格按get/post不同请求方式实现对应功能(get请求用于获取/查询资源信息,post用于更新资源,不过并没有明确规定必须用哪种请求方式实现何种功能,只是一种公认的编程规范)
(2)点击添加员工按钮跳转添加页面(get请求)
1
2
3
4
5
6
7
| @GetMapping("/emp")
public String toAddPage(Model model){
Collection<Department> departments = departmentDao.getAllDepartment();
model.addAttribute("departments", departments);
return "emp/add";
}
|
(3)添加员工信息并返回员工信息页面(post请求)
1
2
3
4
5
6
7
8
| @PostMapping("/emp")
public String addEmp(Employee employee){
System.out.println("save==>"+employee);
employeedao.add(employee);
return "redirect:/emps";
}
|
删除员工信息
理解了添加操作,删除员工信息的设计就简单很多了,在点击删除按钮时只需要根据传入的userid在map中remove掉对应的键值对,并返回到员工信息页面就可。
1
2
3
4
5
6
|
@GetMapping ("/deleEmp/{id}")
public String deleEmp(@PathVariable("id")int id){
employeedao.deleteEmp(id);
return "redirect:/emps";
}
|
修改员工信息与404处理
修改员工信息
修改员工信息这里复用了employeeDao中的add()方法,重新插入一个员工,由于HashMap的键是唯一的,所以总能够重新插入成功(实际上这里与实际接入数据库的情况不一样,数据库中只能通过update去更新用户信息,用insert插入会导致主键冲突,这里在后续接入数据库后有相应的解决方案,请移步本文第2part)
这里有一个问题,看看添加新员工信息的业务源码
1
2
3
4
5
6
7
8
9
|
private static Integer initId = 1006;
public void add(Employee employee){
if(employee.getId()==null){
employee.setId(initId);
}
employee.setDepartment(departmentDao.getDepartmentById(employee.getDepartment().getId()));
employeeMap.put(employee.getId(), employee);
}
|
是我们在添加一个Employee对象时,employee
id是自增形式的。而我们在更新用户信息时采用的也是add()方法,所以会导致并不能完成更新,而且会诡异的发现在每次更新都在不断插入一个新的Employee对象。怎么解决?
这里通过在前端页面中使用隐藏域携带employee
id到页面中比对修改解决该问题。
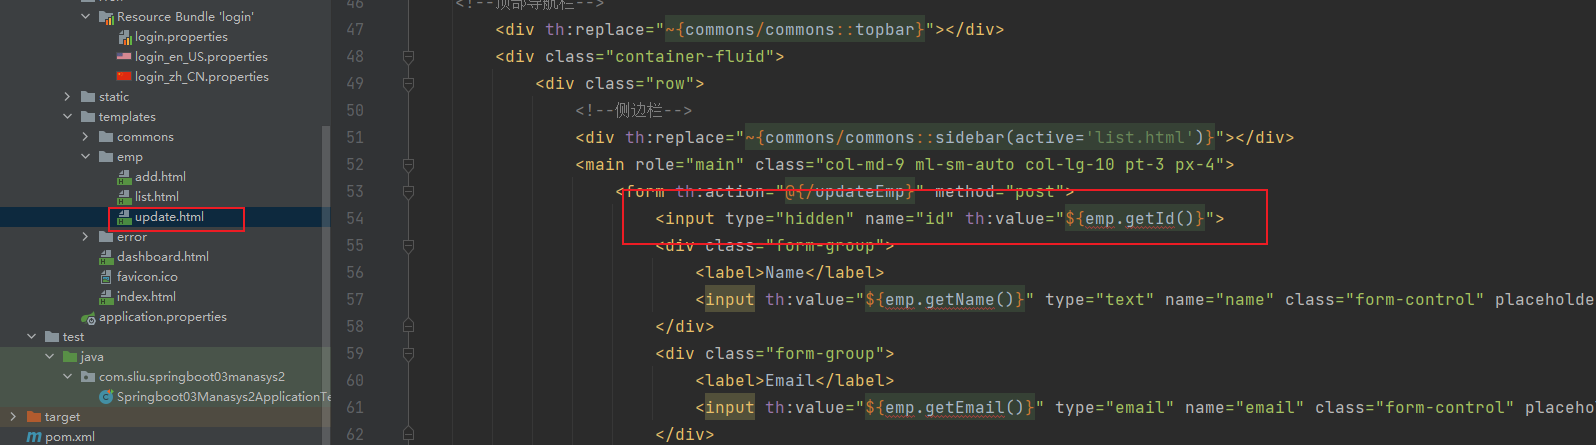 image-20220331103837744
修改信息业务代码如↓
1
2
3
4
5
6
|
@PostMapping("/updateEmp")
public String updateEmp(Employee employee){
employeedao.add(employee);
return "redirect:/emps";
}
|
404页面
在resources/templates下放入404.html
okkk仿数据库的增删改查搞定!