项目源码自取↓:
异步、邮件与定时任务:
https://github.com/codersliu/springtest
springboot整合redis:
https://github.com/codersliu/springboot10-redisTest
异步任务
在开发环境中,对于不能实时返回用户数据的处理过程,应当在处理前通知用户,并在计算完成后返回计算结果。即通过异步任务,在数据开始处理时通知用户当前信息正在处理,处理完毕后返回结果。
通过一个example理解什么是异步任务
新建AsynService用于暂停程序执行,模拟在异步任务中,数据处理过程中的计算
1
2
3
4
5
6
7
8
9
10
11
12
13
14
15
16
17
| package com.sliu.springtest.service;
import org.springframework.stereotype.Repository;
import org.springframework.stereotype.Service;
@Service
public class AsynService {
public void hello(){
try {
Thread.sleep(3000);
} catch (InterruptedException e) {
e.printStackTrace();
}
System.out.println("processing");
}
}
|
新建AsynController用于模拟开始计算及返回计算结果
1
2
3
4
5
6
7
8
9
10
11
12
13
14
15
16
17
18
19
20
| package com.sliu.springtest.controller;
import com.sliu.springtest.service.AsynService;
import org.springframework.beans.factory.annotation.Autowired;
import org.springframework.stereotype.Controller;
import org.springframework.web.bind.annotation.RequestMapping;
import org.springframework.web.bind.annotation.RestController;
@RestController
public class AsynController {
@Autowired
AsynService asynService;
@RequestMapping("/hello")
public String hello(){
asynService.hello();
return "OK!";
}
}
|
访问localhost://8080/hello后,暂停三秒返回“OK!”信息,控制台打印“processing”
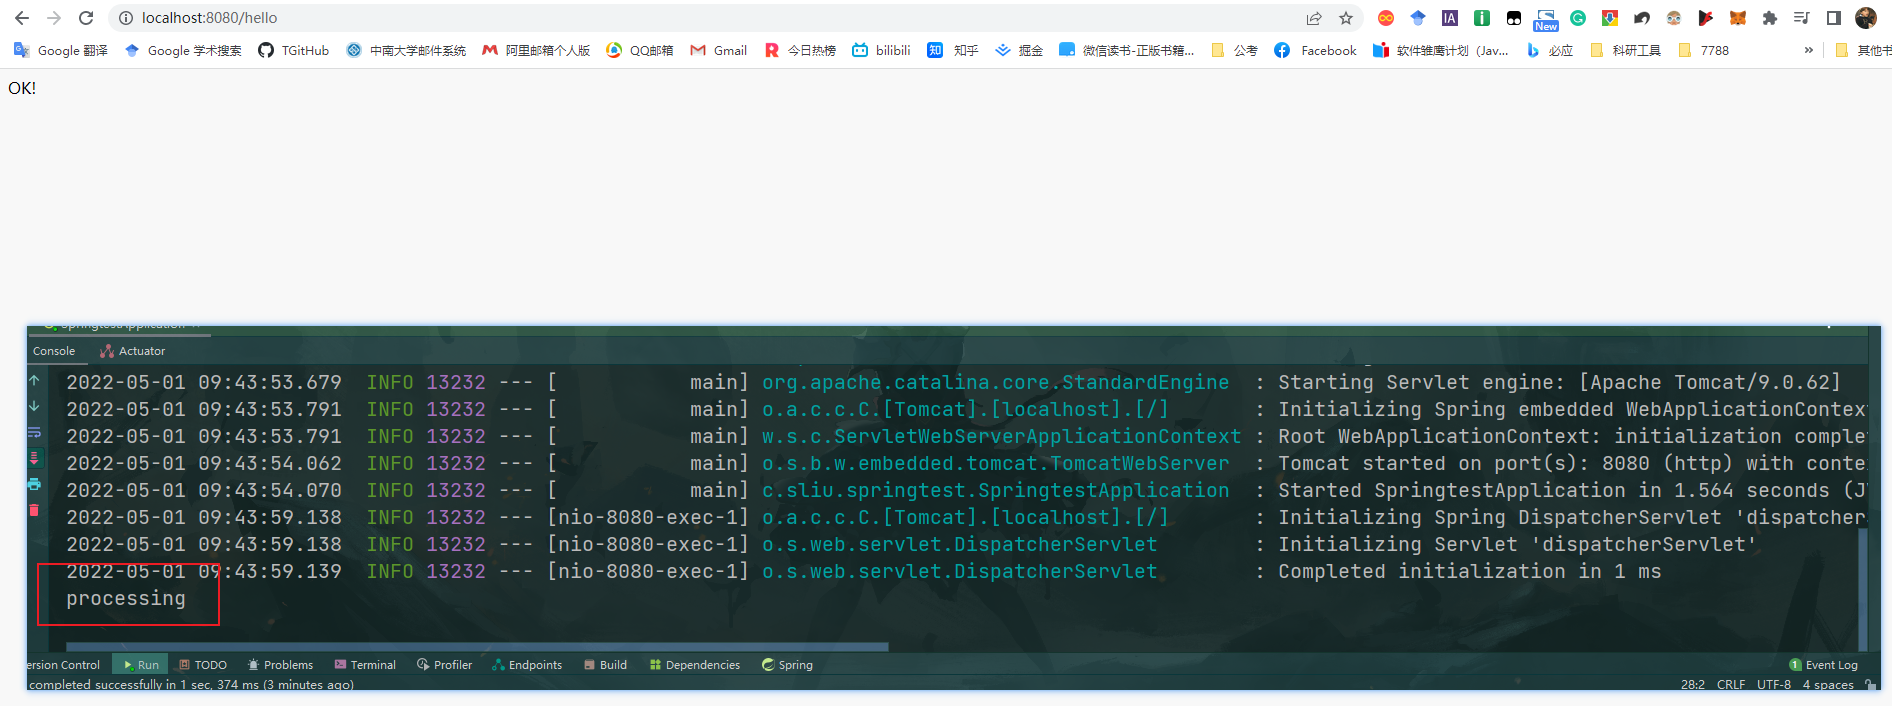
为了实现异步任务而手动编写多线程,阻碍了开发的便利
而spring框架提供操作简便的异步任务注解 解决了该问题
在AsynService上添加@Async注解,指示该服务为一个异步任务
同时在Application上添加@EnableAsync开启异步任务
此时,访问/hello能够得到的结果是,浏览器立即返回“OK!”,而控制台在3s后打印“processing”。不同于手动编写线程实现暂停的过程,该方案下,返回信息不需要等待AsynService中hello()方法执行完毕再开始下一步,而是异步地完成自身任务。
邮箱任务
pom.xml下导入spring-boot-starter-mail依赖
1
2
3
4
| <dependency>
<groupId>org.springframework.boot</groupId>
<artifactId>spring-boot-starter-mail</artifactId>
</dependency>
|
application.properties下配置邮件信息
1
2
3
4
5
| spring.mail.username=1653698757@qq.com
spring.mail.password=jkyhvjgypfppghae
spring.mail.host=smtp.qq.com
spring.mail.properties.mail.smtp.ssl.enable=true
|
其中邮箱为了避免密码外泄,qq邮箱使用了令牌代替,在设置中开启pop3/smtp服务并生成授权码即可

配置完成,准备测试发送邮件
1.发送简单邮件
1
2
3
4
5
6
7
8
9
10
11
12
13
14
15
16
17
| @Autowired
JavaMailSenderImpl mailSender;
@Test
void simEmail(){
SimpleMailMessage mailMessage = new SimpleMailMessage();
mailMessage.setSubject("简单邮件测试-codersliu");
mailMessage.setText("你好啊,csusliu,万事胜意!");
mailMessage.setTo("shunliu@csu.edu.cn");
mailMessage.setFrom("1653698757@qq.com");
mailSender.send(mailMessage);
}
|
收发成功↓

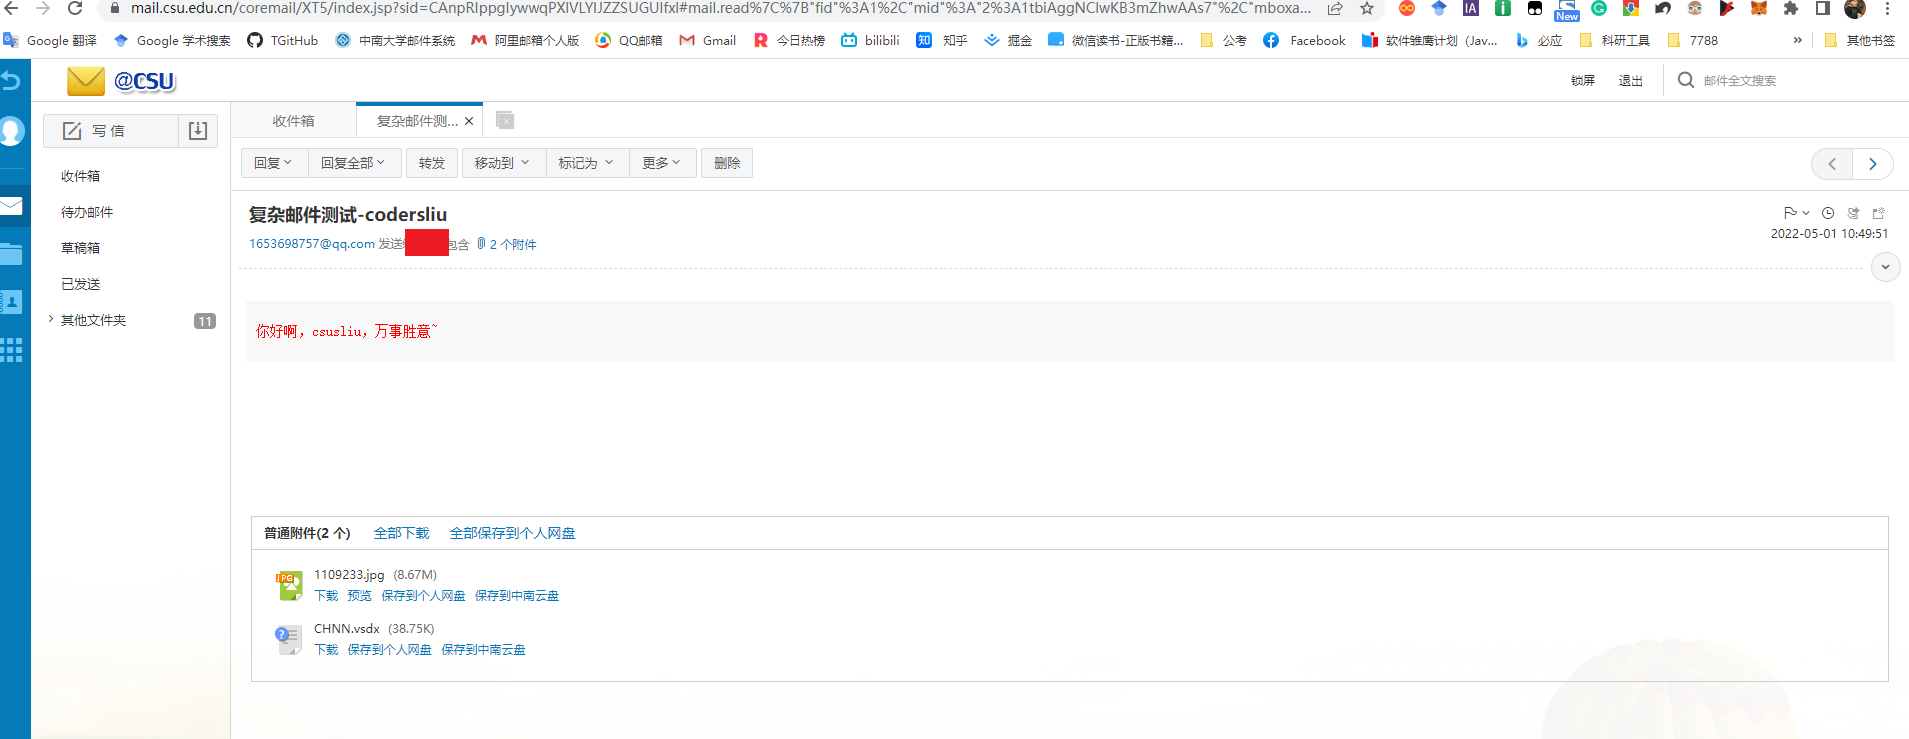
2.发送复杂邮件
1
2
3
4
5
6
7
8
9
10
11
12
13
14
15
16
17
18
19
20
21
| @Test
void compEmail() throws MessagingException {
MimeMessage mimeMessage = mailSender.createMimeMessage();
MimeMessageHelper helper = new MimeMessageHelper(mimeMessage, true);
helper.setSubject("复杂邮件测试-codersliu");
helper.setText("<p style='color:red'>你好啊,csusliu,万事胜意~</p>",true);
helper.addAttachment("1109233.jpg", new File("C:\\Users\\Administrator\\Pictures\\1109233.jpg"));
helper.addAttachment("CHNN.vsdx", new File("C:\\Users\\Administrator\\Desktop\\CHNN.vsdx"));
helper.setTo("shunliu@csu.edu.cn");
helper.setFrom("1653698757@qq.com");
mailSender.send(mimeMessage);
}
|
测试收发成功↓
定时任务
如何指定一个任务按照提前规划的时间执行?
Application下开启Scheduled
新建service/ScheduleService
1
2
3
4
5
6
7
8
9
10
11
12
13
14
15
16
17
18
19
| package com.sliu.springtest.service;
import org.springframework.scheduling.annotation.Scheduled;
import org.springframework.stereotype.Service;
@Service
public class ScheduleService {
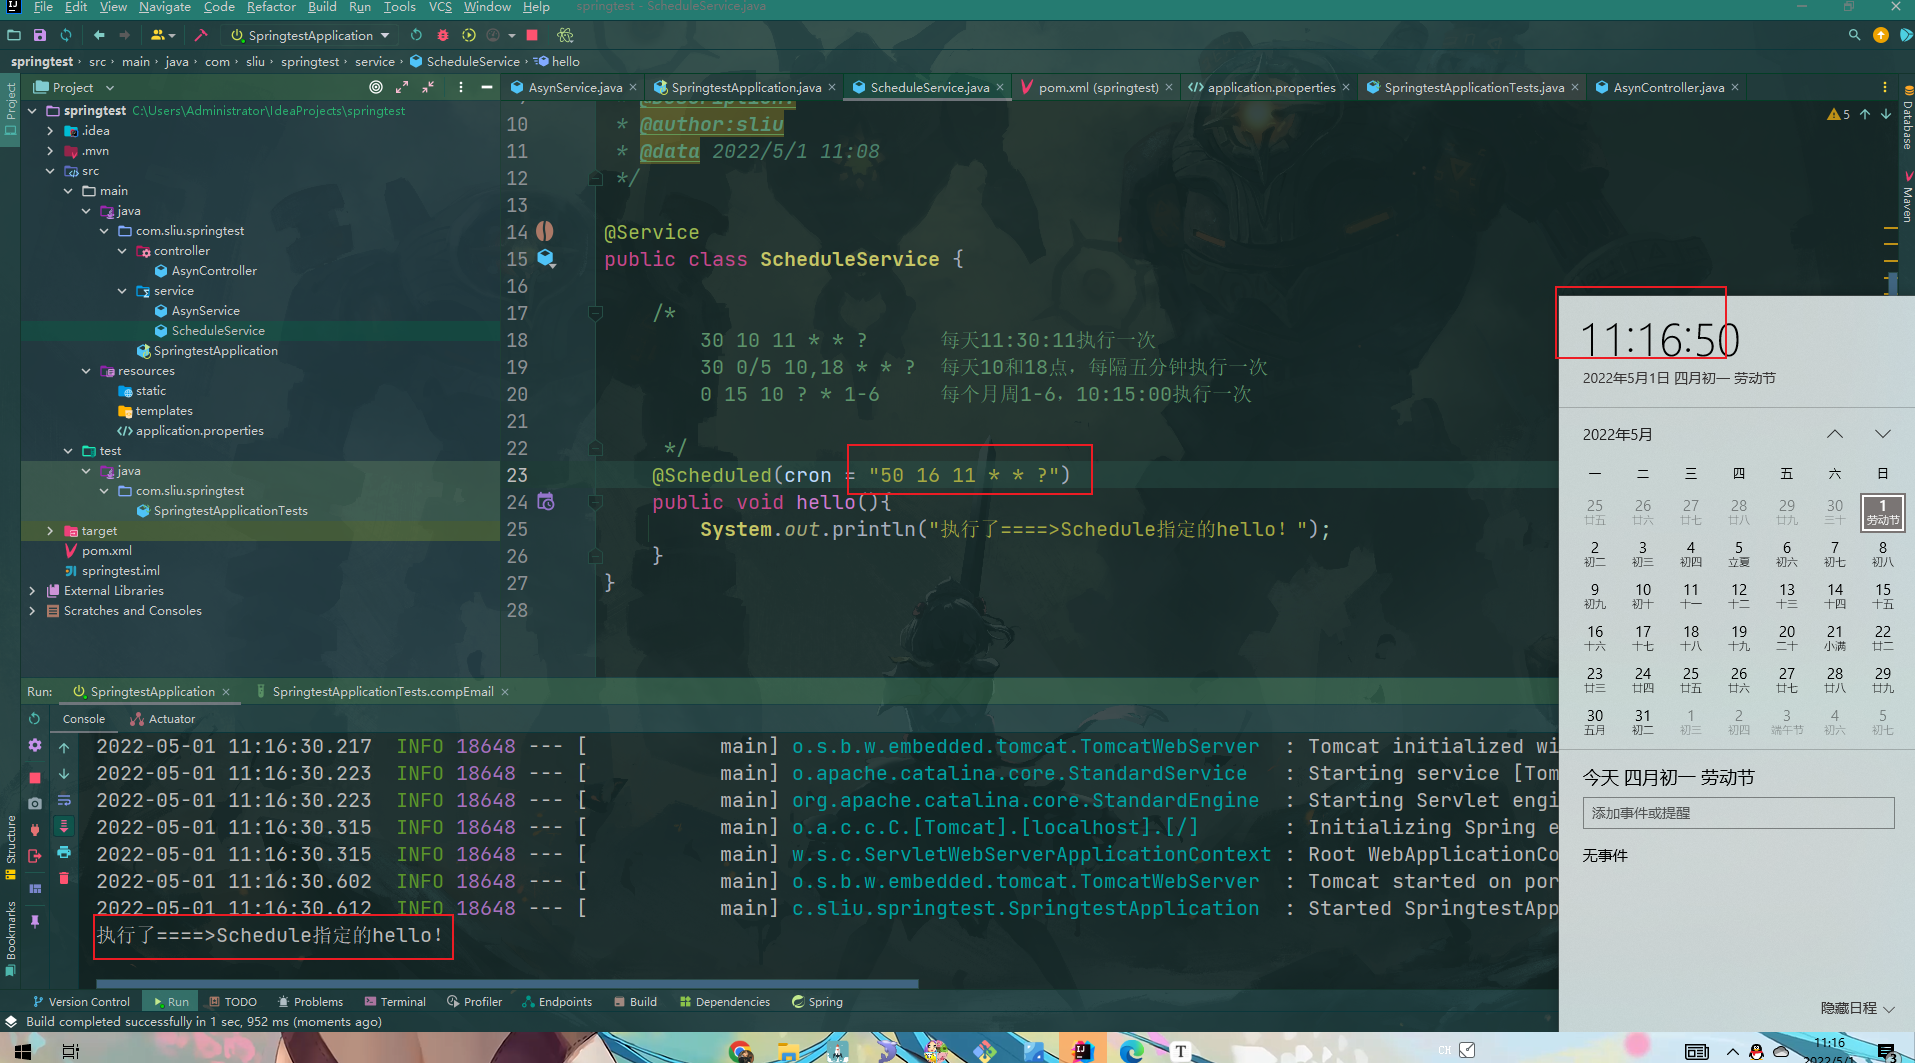
@Scheduled(cron = "50 16 11 * * ?")
public void hello(){
System.out.println("执行了====>Schedule指定的hello!");
}
}
|
测试通过↓
SpringBoot集成Redis
快速开始
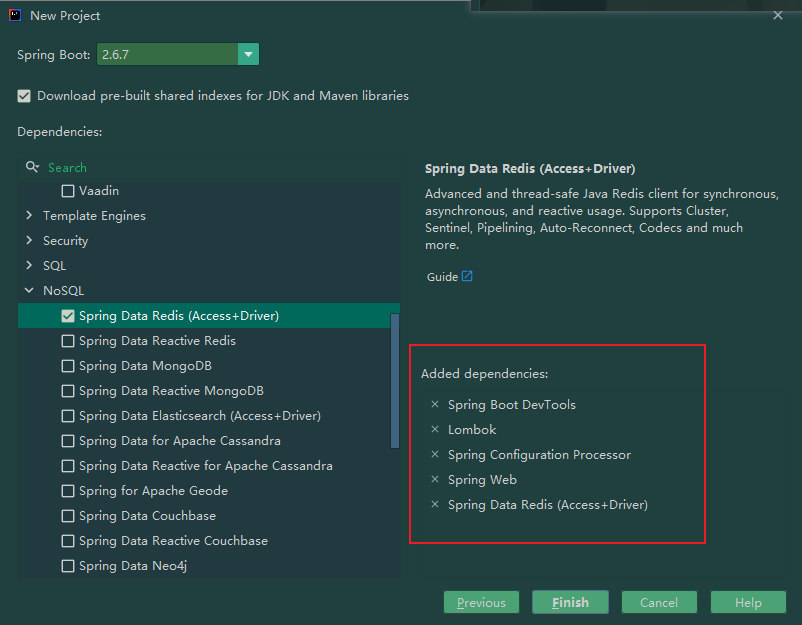
新建项目,导入以下依赖
application.properties下配置Redis服务
1
2
3
|
spring.redis.host=127.0.0.1
spring.redis.port=6379
|
添加测试方法
1
2
3
4
5
6
7
8
9
10
11
12
13
14
15
16
17
18
19
20
21
22
23
| @Autowired
RedisTemplate redisTemplate;
@Test
void redisTest(){
redisTemplate.opsForValue().set("mykey","sliu's redis test");
System.out.println(redisTemplate.opsForValue().get("mykey"));
}
|
运行测试类,运行前需要开启redis服务。在redis安装目录下,执行
1
| redis-server.exe redis.windows.conf
|
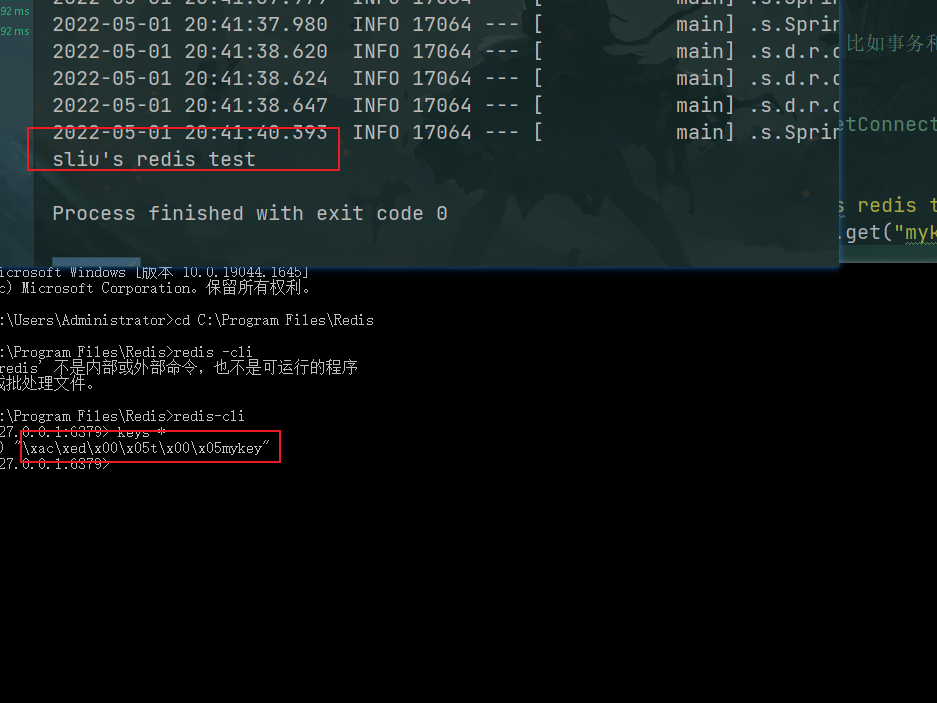
自定义redisTemplate
以上测试过程中,对于set的redis键值对,查询结果为乱码,这是由于在插入键值对时未对其进行序列化,需要通过自定义redisTemplate解决该问题
新建config/RedisConfig自定义RedisTemplate并指定序列化方式
1
2
3
4
5
6
7
8
9
10
11
12
13
14
15
16
17
18
19
20
21
22
23
24
25
26
27
28
29
30
31
32
33
34
35
36
37
38
39
40
41
42
43
44
45
46
47
48
| package com.sliu.springboot10redistest.config;
import com.fasterxml.jackson.annotation.JsonAutoDetect;
import com.fasterxml.jackson.annotation.PropertyAccessor;
import com.fasterxml.jackson.databind.ObjectMapper;
import org.springframework.context.annotation.Bean;
import org.springframework.context.annotation.Configuration;
import org.springframework.data.redis.connection.RedisConnectionFactory;
import org.springframework.data.redis.core.RedisTemplate;
import org.springframework.data.redis.serializer.Jackson2JsonRedisSerializer;
import org.springframework.data.redis.serializer.StringRedisSerializer;
@Configuration
public class RedisConfig {
@Bean
@SuppressWarnings("all")
public RedisTemplate<String, Object> redisTemplate(RedisConnectionFactory factory){
RedisTemplate<String, Object> template = new RedisTemplate<>();
template.setConnectionFactory(factory);
Jackson2JsonRedisSerializer jackson2JsonRedisSerializer = new Jackson2JsonRedisSerializer(Object.class);
ObjectMapper om = new ObjectMapper();
om.setVisibility(PropertyAccessor.ALL, JsonAutoDetect.Visibility.ANY);
om.enableDefaultTyping(ObjectMapper.DefaultTyping.NON_FINAL);
jackson2JsonRedisSerializer.setObjectMapper(om);
StringRedisSerializer stringRedisSerializer = new StringRedisSerializer();
template.setKeySerializer(stringRedisSerializer);
template.setHashKeySerializer(stringRedisSerializer);
template.setValueSerializer(jackson2JsonRedisSerializer);
template.setHashValueSerializer(jackson2JsonRedisSerializer);
template.afterPropertiesSet();
return template;
}
}
|
测试方法中替换自动注入的template为上面自定义模版
1
2
3
4
5
6
7
8
9
10
11
12
13
14
15
16
17
18
19
20
21
22
23
24
| @Autowired
@Qualifier("redisTemplate")
RedisTemplate redisTemplate;
@Test
void redisTest(){
redisTemplate.opsForValue().set("mykey","sliu's redis test");
System.out.println(redisTemplate.opsForValue().get("mykey"));
}
|
运行后再次在redis-cli中进行查询,不再有乱码

总结
本part后理解了如何开发带有定时任务、异步任务的需求,同时掌握了如何发送邮件。并对如何集成redis、键值对的序列化有了初步了解。
bye~