Swagger简介
当前开发中前后端分离通过API实现,前端页面封装数据在json文件中模拟pojo中的实体类信息,后端与前端交互时通过接口获取的信息替换json中的模拟数据,实现前后端的分离。该开发模式中前后端分离程度高,甚至可以将前后端部署在不同服务器上。
存在的问题是前后端集成联调的过程中信息不同步会导致开发受阻(例如对于前端需求,后端开发了对应的接口,而此时需求变更,前端需要添加一个信息字段。后端就需要对数据库、接口等进行编码)。因而如何让需求变更在前后端开发人员之前保持实时同步,对于避免此类开发危机至关重要。
早期的解决方案中,前端使用postman进行后端返回的接口测试。而后端负责提供接口,而关键就在于后端需要保证接口信息变动的实时同步,提前制定Schema。
为了解决后端实时同步接口变动信息,Swagger应运而生。
Swagger特性:
- RestFul风格的API文档在线自动生成工具=>Api文档与Api定义同步更新
- 直接运行,在线测试Api接口
- 支持多种语言
Swagger官网
使用Swagger需要导入springbox jar包,包括:
项目源码自取↓:
https://github.com/codersliu/springboot09-swagger
SpringBoot集成Swagger
快速开始
新建项目,pom.xml下引入springfox-swagger依赖
1
2
3
4
5
6
7
8
9
10
11
12
13
|
<dependency>
<groupId>io.springfox</groupId>
<artifactId>springfox-swagger2</artifactId>
<version>2.9.2</version>
</dependency>
<dependency>
<groupId>io.springfox</groupId>
<artifactId>springfox-swagger-ui</artifactId>
<version>2.9.2</version>
</dependency>
|
新建Swagger/controller/HelloController.java用于测试
1
2
3
4
5
6
7
8
9
10
11
12
| package com.sliu.springboot09swagger.swagger.controller;
import org.springframework.web.bind.annotation.RequestMapping;
import org.springframework.web.bind.annotation.RestController;
@RestController
public class HelloController {
@RequestMapping(value = "/hello")
public String hello(){
return "Hello Swagger";
}
}
|
新建swagger/config/SwaggerConfig开启Swagger2
1
2
3
4
5
6
7
8
9
10
| package com.sliu.springboot09swagger.swagger.config;
import org.springframework.context.annotation.Configuration;
import springfox.documentation.swagger2.annotations.EnableSwagger2;
@Configuration
@EnableSwagger2
public class SwaggerConfig {
}
|
启动项目出现兼容性问题,错误提示:空指针异常。降低springboot版本为2.5.5
1
2
3
4
5
6
| <parent>
<groupId>org.springframework.boot</groupId>
<artifactId>spring-boot-starter-parent</artifactId>
<version>2.5.5</version>
<relativePath/>
</parent>
|
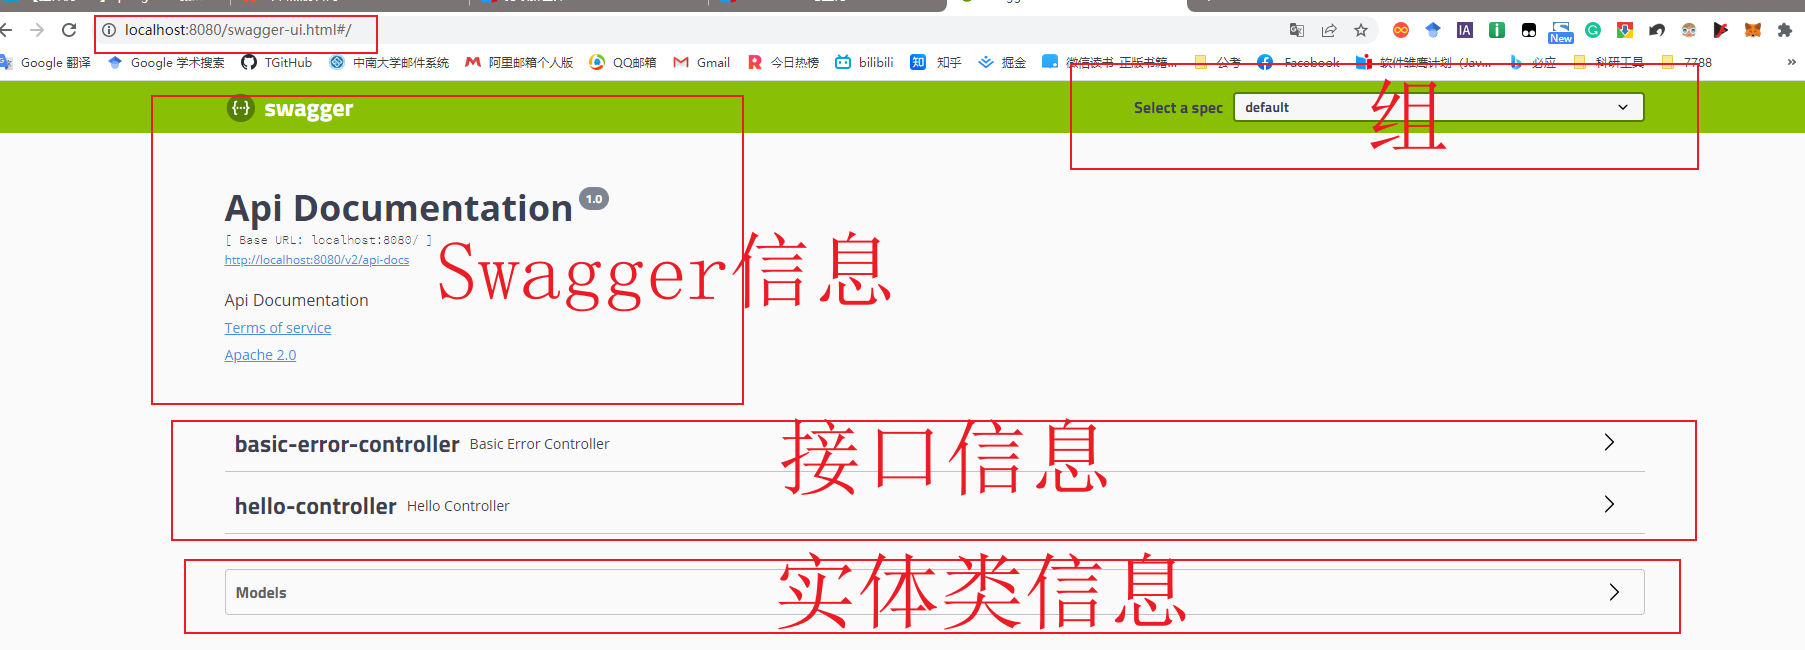
搞定,访问http://localhost:8080/swagger-ui.html
进入管理页面
配置Swagger
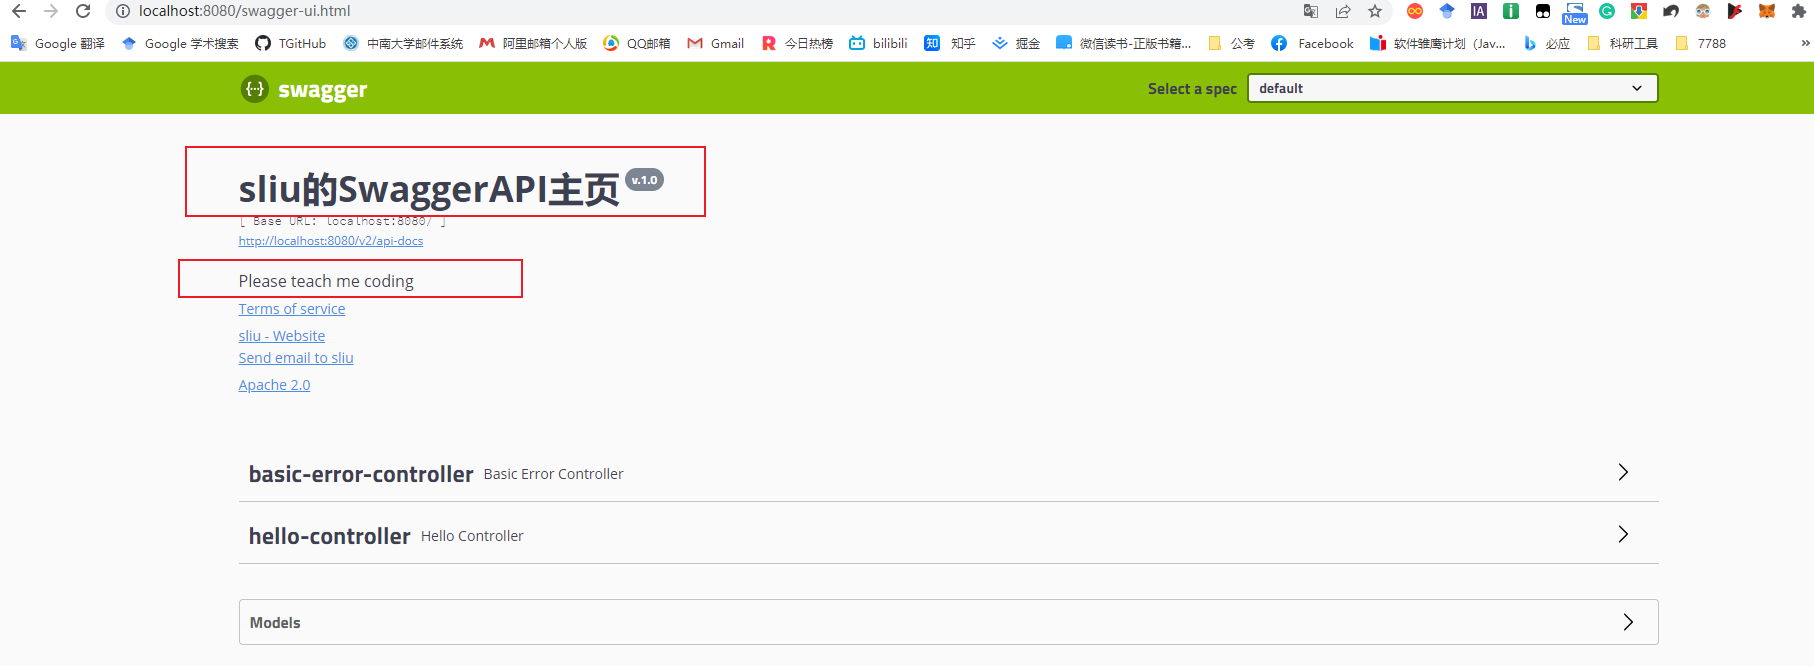
上一节中访问页面swagger-ui.html中,修改部分自定义信息,由于ApiInfo未提供get,set方法,通过有参构造实现。修改SwaggerConfig
1
2
3
4
5
6
7
8
9
10
11
12
13
14
15
16
17
18
19
20
21
22
23
24
25
26
27
28
29
30
31
32
33
34
35
36
37
38
39
40
41
42
43
44
45
46
| package com.sliu.springboot09swagger.config;
import org.springframework.context.annotation.Bean;
import org.springframework.context.annotation.Configuration;
import springfox.documentation.service.ApiInfo;
import springfox.documentation.service.Contact;
import springfox.documentation.spi.DocumentationType;
import springfox.documentation.spring.web.plugins.Docket;
import springfox.documentation.swagger2.annotations.EnableSwagger2;
import java.util.ArrayList;
@Configuration
@EnableSwagger2
public class SwaggerConfig {
@Bean
public Docket docket(){
return new Docket(DocumentationType.SWAGGER_2)
.apiInfo(apiInfo());
}
private ApiInfo apiInfo(){
Contact contact = new Contact(
"sliu",
"http://shunliu.xyz",
"shunliu@csu.edu.cn");
return new ApiInfo("sliu的SwaggerAPI主页",
"Please teach me coding",
"v.1.0",
"https://shunliu.xyz",
contact,
"Apache 2.0",
"http://www.apache/org/licenses/LICENSE-2.0",
new ArrayList());
}
}
|
修改后页面↓
配置扫描接口和开关
SwaggerConfig中配置扫描接口
1
2
3
4
5
6
7
8
9
10
11
12
13
14
15
16
17
18
19
20
21
22
23
24
25
26
27
28
29
30
31
32
33
34
35
36
37
38
39
40
41
42
43
44
45
46
47
48
49
50
51
52
53
54
55
56
57
58
59
60
| package com.sliu.springboot09swagger.config;
import org.springframework.context.annotation.Bean;
import org.springframework.context.annotation.Configuration;
import springfox.documentation.builders.PathSelectors;
import springfox.documentation.builders.RequestHandlerSelectors;
import springfox.documentation.service.ApiInfo;
import springfox.documentation.service.Contact;
import springfox.documentation.spi.DocumentationType;
import springfox.documentation.spring.web.plugins.Docket;
import springfox.documentation.swagger2.annotations.EnableSwagger2;
import java.util.ArrayList;
import java.util.Objects;
@Configuration
@EnableSwagger2
public class SwaggerConfig {
@Bean
public Docket docket(){
return new Docket(DocumentationType.SWAGGER_2)
.apiInfo(apiInfo())
.select()
.apis(RequestHandlerSelectors.basePackage("com.sliu.springboot09swagger.contorller"))
.paths(PathSelectors.ant("/hello"))
.build();
}
private ApiInfo apiInfo(){
Contact contact = new Contact(
"sliu",
"http://shunliu.xyz",
"shunliu@csu.edu.cn");
return new ApiInfo("sliu的SwaggerAPI主页",
"Please teach me coding",
"v.1.0",
"https://shunliu.xyz",
contact,
"Apache 2.0",
"http://www.apache/org/licenses/LICENSE-2.0",
new ArrayList());
}
}
|
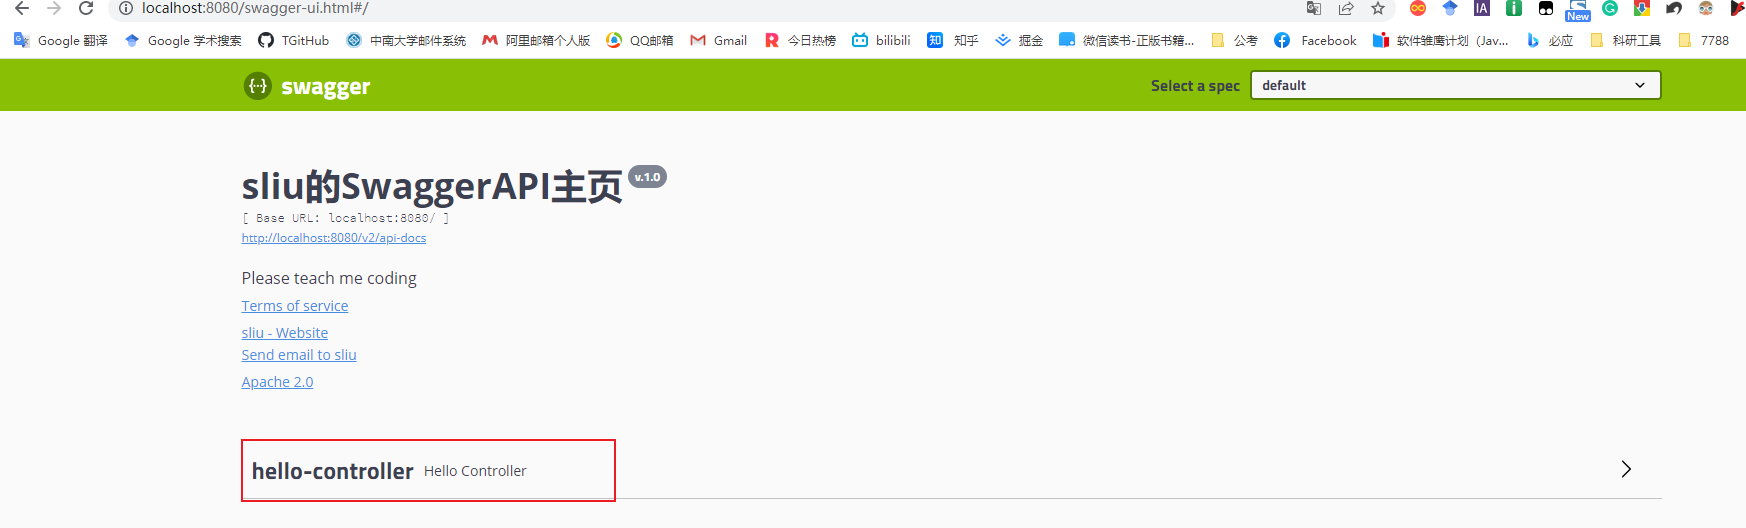
配置完成后不再扫描/error请求,仅扫描com.sliu.xxx.controller包下/hello请求
为了实现在开发环境下开启Swagger,而实际部署时关闭,采用以下方案实现:
- 判断是不是生产环境flag=false
- 注入enable(flag)
(即开发中的多环境配置过程,通常采用不同的配置文件properties实现)
新建dev环境配置resources/application-dev.properties
新建pro生成环境配置resources/application-pro.properties
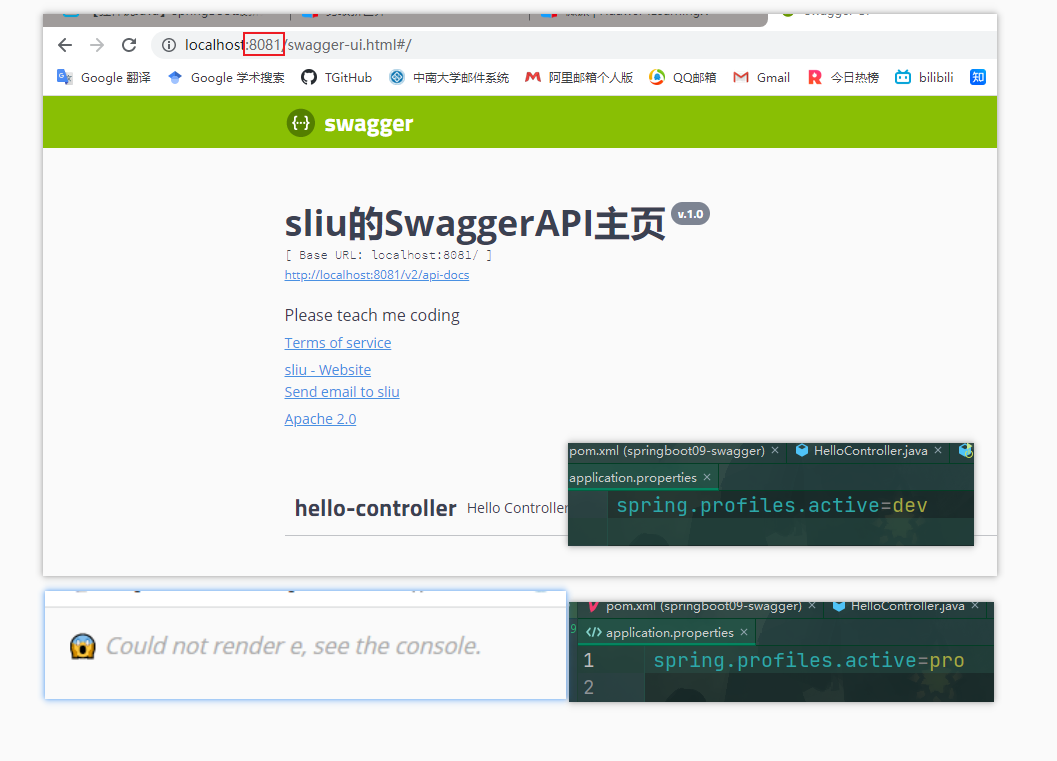
系统配置application.properties下开启dev环境
1
| spring.profiles.active=dev
|
SwaggerConfig下添加判断当前环境逻辑
1
2
3
4
5
6
7
8
9
10
11
12
13
14
15
16
17
18
19
20
21
22
23
24
25
26
|
@Bean
public Docket docket(Environment environment){
Profiles profiles = Profiles.of("dev", "test");
boolean flag = environment.acceptsProfiles(profiles);
System.out.println(flag);
return new Docket(DocumentationType.SWAGGER_2)
.apiInfo(apiInfo())
.enable(flag)
.select()
.apis(RequestHandlerSelectors.basePackage("com.sliu.springboot09swagger.contorller"))
.paths(PathSelectors.ant("/hello"))
.build();
}
|
配置完成后,dev环境下swagger开启,pro环境下关闭↓
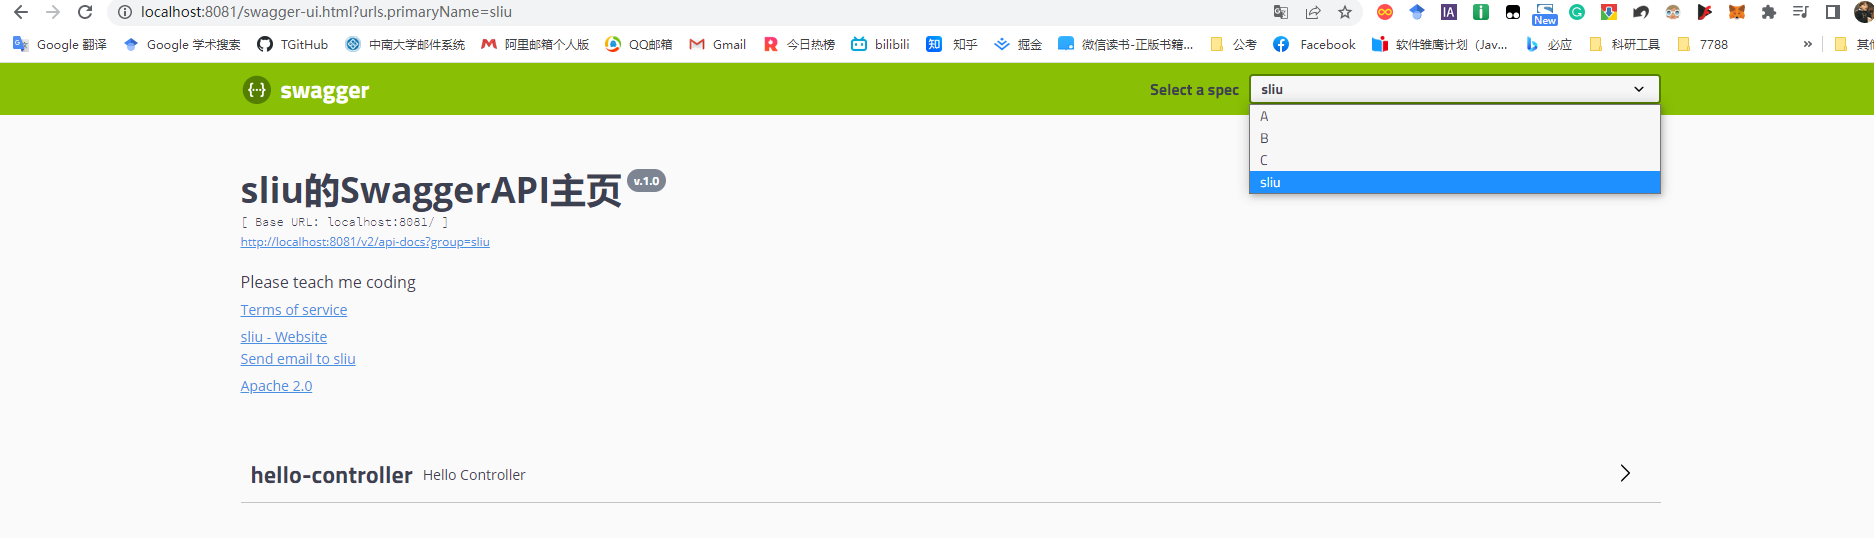
API文档分组&接口注释
SwaggerConfig中配置多个Docket分组,并将之前创建的Docket设置分组名为"sliu"
1
2
3
4
5
6
7
8
9
10
11
12
13
14
15
16
17
18
19
20
21
22
23
24
25
26
27
28
29
30
31
32
33
34
35
36
37
38
39
40
41
42
43
44
45
46
| @Configuration
@EnableSwagger2
public class SwaggerConfig {
@Bean
public Docket docket1(){
return new Docket(DocumentationType.SWAGGER_2).groupName("A");
}
@Bean
public Docket docket2(){
return new Docket(DocumentationType.SWAGGER_2).groupName("B");
}
@Bean
public Docket docket3(){
return new Docket(DocumentationType.SWAGGER_2).groupName("C");
}
@Bean
public Docket docket(Environment environment){
Profiles profiles = Profiles.of("dev", "test");
boolean flag = environment.acceptsProfiles(profiles);
System.out.println(flag);
return new Docket(DocumentationType.SWAGGER_2)
.apiInfo(apiInfo())
.groupName("sliu")
.enable(flag)
.select()
.apis(RequestHandlerSelectors.basePackage("com.sliu.springboot09swagger.contorller"))
.paths(PathSelectors.ant("/hello"))
.build();
}
|
配置完成后管理页面依据分组划分管理↓
接下来对swagger下的model块中实体类进行配置
新建实体类pojo/User.java用于测试
1
2
3
4
5
6
| package com.sliu.springboot09swagger.pojo;
public class User {
private String username;
private String password;
}
|
controller/HelloController下添加返回User实体类请求
1
2
3
4
5
6
7
8
9
10
11
12
13
14
15
16
17
18
19
20
21
| package com.sliu.springboot09swagger.contorller;
import com.sliu.springboot09swagger.pojo.User;
import org.springframework.web.bind.annotation.GetMapping;
import org.springframework.web.bind.annotation.PostMapping;
import org.springframework.web.bind.annotation.RequestMapping;
import org.springframework.web.bind.annotation.RestController;
@RestController
public class HelloController {
@GetMapping("/hello")
public String hello(){
return "Hello Swagger";
}
@PostMapping("/user")
public User user(){
return new User();
}
}
|
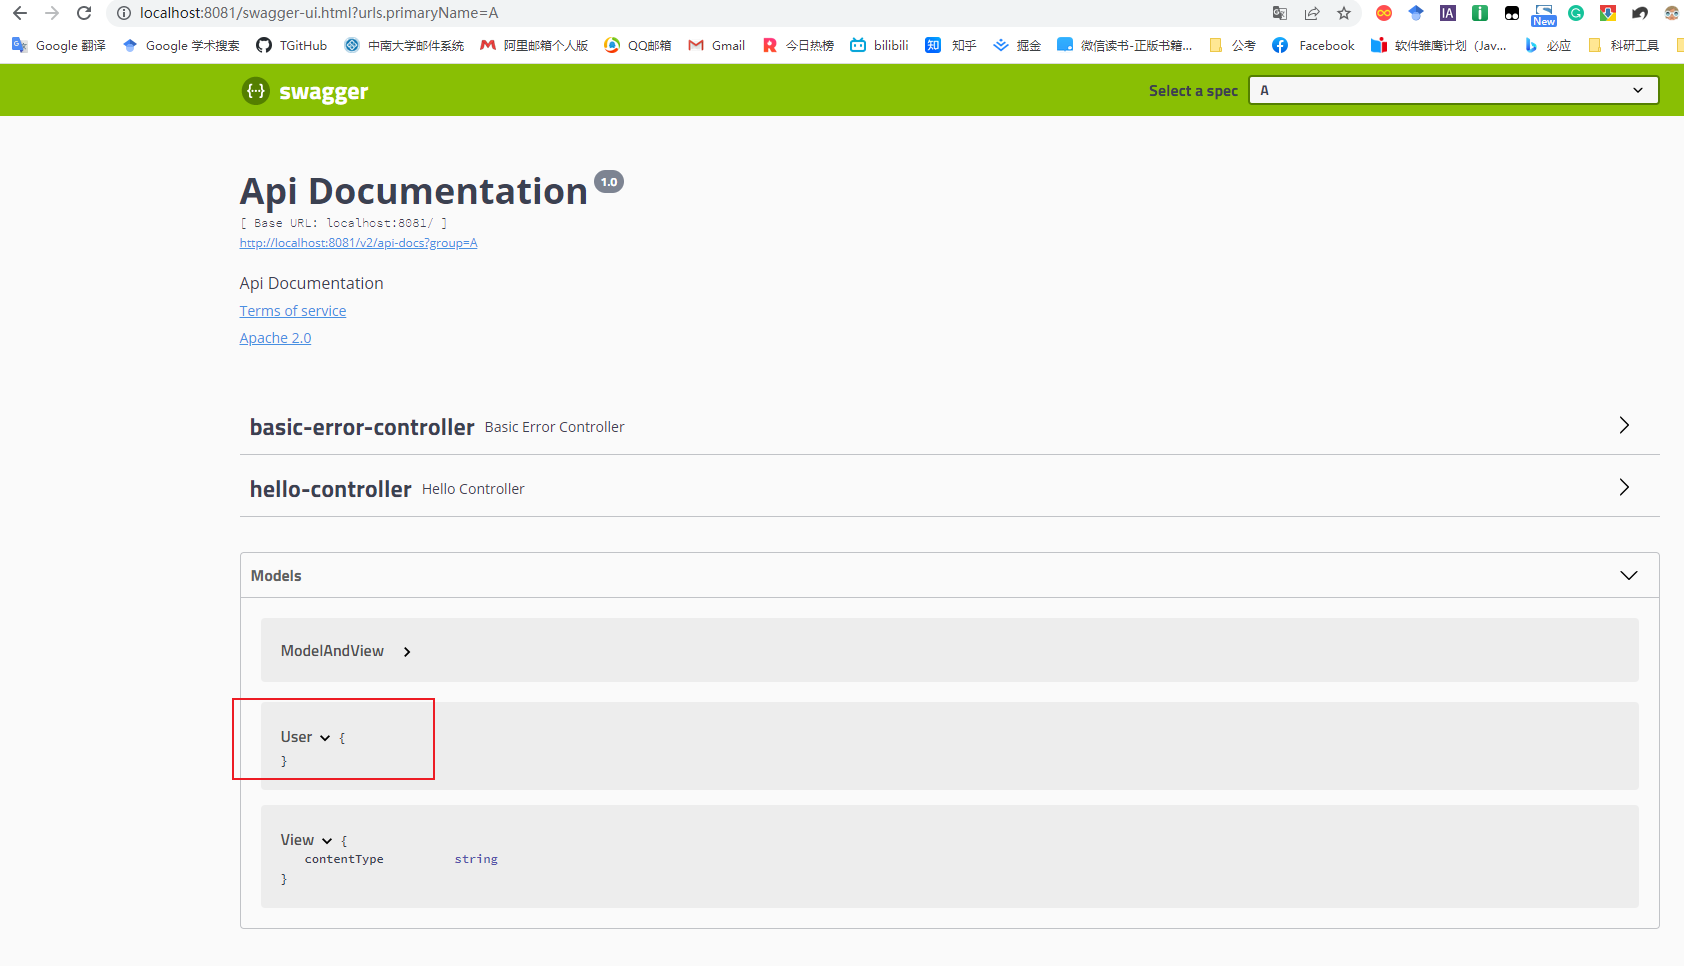
配置完成后能够扫描到model信息
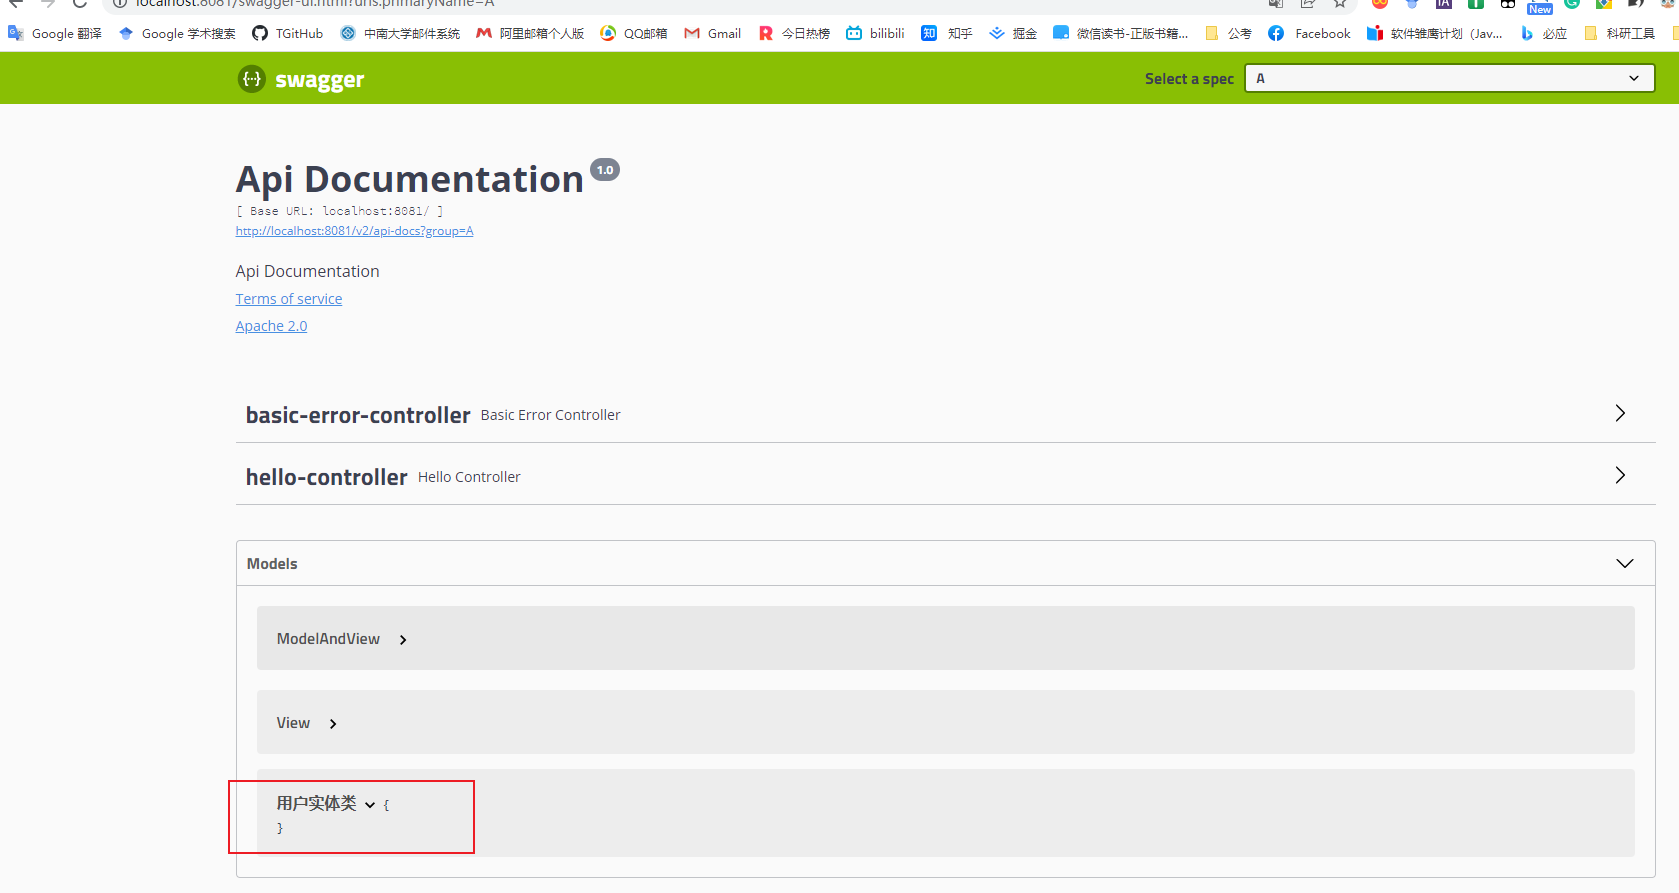
为了便于理解,通过注解为实体类添加在swagger中的注释信息
1
2
3
4
5
6
7
| @ApiModel("用户实体类")
public class User {
@ApiModelProperty("用户名")
private String username;
@ApiModelProperty("密码")
private String password;
}
|
添加后↓(由于在User类中各属性为private修饰,并且未添加get&set方法,未展示属性信息)
总结
本part中详细介绍了如何集成和使用swagger,实现了文档实时更新和接口的在线测试。
要注意的是,在正式发布时请关闭Swagger,避免暴露接口信息
Swagger,搞定!